
A Grandstream GDS3710 can use an IllyVoIP SIP identity to place an audio call when someone presses its doorbell. Configure the SIP account, select the intended call destination and test registration and two-way audio before relying on it for reception.
This guide follows the GDS371x manual covering GDS3710/GDS3712 firmware 1.0.13.15, checked October 9, 2026, and is scoped to the GDS3710. It is a documented configuration path, not hardware-certified interoperability. Video, remote unlocking, relay wiring and access-control design are outside this audio-call walkthrough.
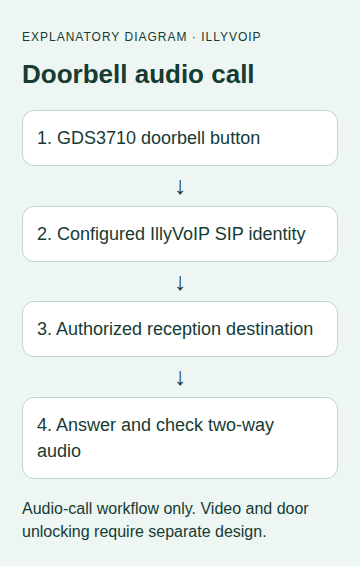
1. Prepare the device and a suitable SIP line
- Have the GDS3710 installed and powered according to its own installation documentation, with network access and authorized device-administrator access.
- In IllyVoIP, open Services → SIP Lines and select the identity intended for the intercom.
- Read its SIP username, authentication details, password, server, transport and audio mode. Do not use your Portal password as the SIP password.
- Choose an authorized reception destination and check the line’s calling permission, balance and applicable rate.
This walkthrough assumes password-based SIP registration. Do not switch an existing IP-authenticated line or reuse a busy shared identity without checking its other users. If you need another line, follow Create a SIP line and review any charge before confirming.
2. Map the SIP account fields
Open the device’s local administration page from a trusted network. In the intended SIP account’s SIP Basic Settings, use these mappings:
- Account Active: enable the account.
- SIP Server: the IllyVoIP server hostname shown for your line.
- SIP User ID: the line’s SIP username.
- Authenticate ID: the line’s authentication username.
- Password: the SIP password.
Save/apply and inspect registration. The field names and doorbell controls are documented in the Grandstream GDS371x manual. Do not invent a secondary server or outbound proxy; populate those only when your IllyVoIP connection details require them.
3. Match signaling and audio settings
Use a transport and port supported by both the device and the selected IllyVoIP line. Signaling encryption and media encryption are different settings. Do not choose a browser’s DTLS-SRTP mode for a SIP intercom merely because both use the same account.
For a straightforward audio negotiation, compare the device’s offered PCMA/PCMU codecs with the line’s supported configuration. If the current line requires a mode the device cannot use, ask Support about the exact model/firmware instead of weakening a working security setting. Registration alone does not demonstrate two-way audio.
Keep the device administration page private. Do not expose it or broadly disable your firewall for this setup. Follow the network’s established SIP/NAT policy.
4. Configure a doorbell call without changing access control
- Open the device’s door-system settings.
- For the doorbell action, select Call Doorbell Number.
- Set Number Called When Door Bell Pressed to the intended, authorized reception destination.
- Save/apply the change and recheck the selected SIP account.
Use the destination format accepted by your IllyVoIP line; for an external telephone number, include the country code. Do not copy another account’s extension or use the SIP server address as the called number. The manual also has relay-control actions: they are not needed for this audio-only example.
For example, the intercom can call a reception telephone number that you control. A successful call to that number does not prove that video, door release, alarms or emergency functions work. Plan those separately with the responsible installer.
5. Test the actual entrance-to-reception path
- Confirm the device’s SIP account is registered.
- Tell reception you are about to make a test; check that nobody needs the entrance system during the change.
- Press the doorbell once and confirm that the intended destination rings.
- Answer and speak in both directions. Check intelligibility at the intercom and at reception.
- Hang up and confirm that the call clears. Check the Portal’s call record for the destination, duration and charge.
Normal call charges apply. If incoming calls to the intercom are part of your intended design, verify their separate number/destination routing and the device’s answering policy; do not assume that an outgoing doorbell test proves incoming behavior. This guide does not ask you to enable automatic answering or remote opening.
Troubleshoot the failing stage
- Registration fails: compare the selected account, username/authentication ID, password, server and transport. Check local connectivity and the line’s actual authentication mode.
- Registered, but pressing the button does nothing: check the doorbell action and called-number field, then inspect whether a call attempt was recorded.
- The wrong phone rings: verify the saved destination and selected SIP account. Do not change credentials to fix a destination typo.
- The destination rejects the call: review the number format, permissions, balance and receiving system’s state.
- One-way or missing audio: compare media mode and network path. Do not mistake successful SIP registration for media acceptance.
- Settings revert: check device provisioning with its administrator.
What to keep with your setup notes
Record the model, firmware, selected SIP line, doorbell destination, test time and observed results. Keep passwords out of screenshots and support tickets. The diagram here is explanatory; no authenticated GDS3710 screenshot was available, and no vendor image is presented as a tested installation.