
IllyVoIP creates a main SIP identity for your account. You can also add SIP lines for devices and PBX systems, or agents for people who need access to your contact center. These are separate choices in the current Portal.
Find your existing SIP account
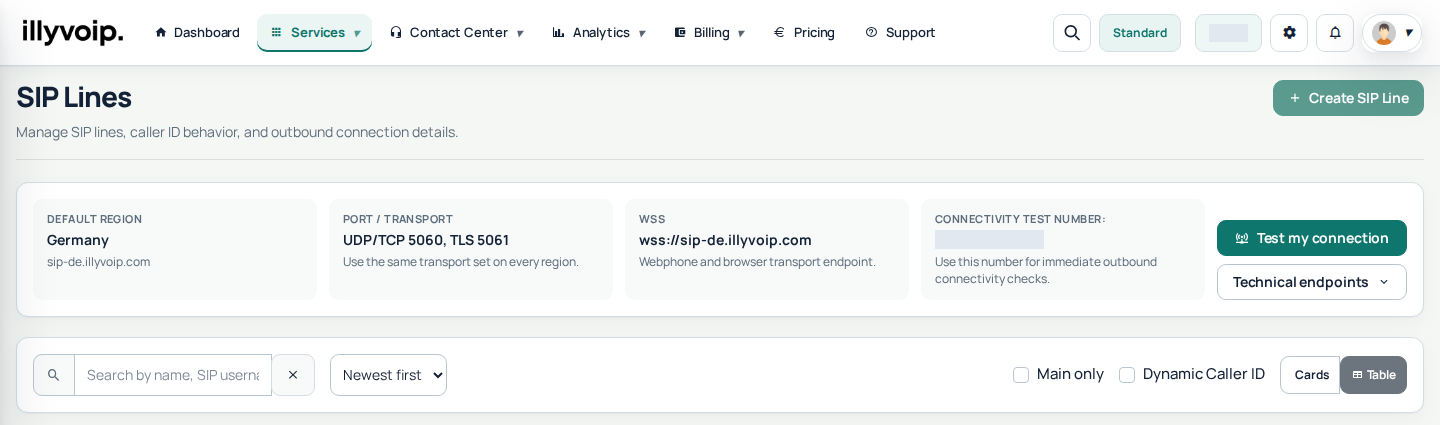
Open Services → SIP Lines. Review the line, authentication mode and connection settings. Use the search, sorting and card/table controls to find the identity you need.
Create an additional SIP line
- On SIP Lines, select Create SIP line.
- Enter the requested information and review the authentication and pricing details shown.
- Confirm creation only after checking the charge and renewal terms, if applicable.
- Use the newly created identity's details when configuring your softphone or PBX. Store credentials securely.
Create an agent account
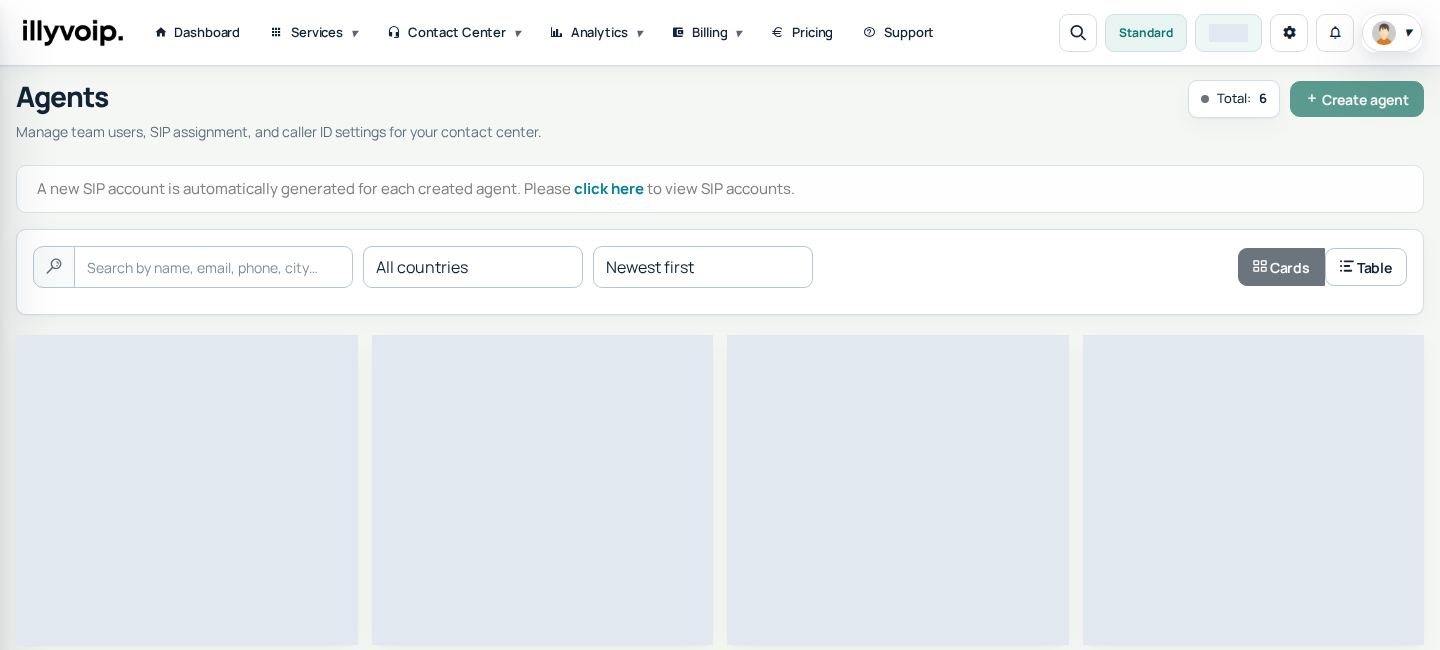
For a team member who needs a Portal workspace, open Contact Center → Agents and select Create agent. Complete the identity and access fields shown in the form and review the seat terms. An agent receives an associated SIP identity; a SIP-only line does not need a separate person's Portal account.
Send an agent's setup email or password reset link
- Open Contact Center → Agents and identify the intended teammate. Check the recipient before using an email action.
- Open the agent's Actions menu. An agent awaiting setup can offer Send setup email; an established agent can offer Send reset link. These actions serve different states.
- Select the offered action and read the confirmation. Submit once, then wait for its result.
- Ask the teammate to check the correct inbox and spam folder. A queued email means the request was accepted for delivery, not that it has arrived or that setup is complete.
- The teammate should use the latest valid link and follow its instructions privately. Refresh the agent list afterward and check the actual setup state.
Sending a fresh setup link replaces the previous setup credential. Avoid repeatedly resending while a teammate is using a link. If the Portal reports that the state changed, refresh: the agent may have completed setup and now need a reset link instead. Follow the expiry information on the email or link; do not assume an old email remains usable indefinitely.
Resolve pending setup before changing telephony settings
The agent editor explains when setup is pending. Profile and permission changes can remain available, but password and voicemail changes require completed setup. Do not treat a disabled voicemail control as a missing mailbox until this prerequisite is satisfied.
If the recipient address is wrong, use Change email & send setup when it is offered to the owner for that pending agent. Do not try to overwrite an established agent's email in the ordinary editor. For an unavailable delivery service, wait and follow the reported error; an unsuccessful queueing attempt does not justify creating another agent seat.
After setup, configure voicemail separately if the employee needs it. See Enable voicemail and email delivery for an agent. A reset of the person's Portal password is separate from rotating SIP credentials used by a phone.
Manage your agents
Use the agent's Actions menu to manage the options available to your account. Caller ID eligibility follows the owner account and routing-package policy. Configure customer access and contact-center features only as appropriate for that person's role.
Agent workspace and external softphones
Agents sign in using their own login details and can access the features assigned to them. For an external SIP application, use the associated SIP credentials—not the Portal login password. See the Zoiper, MicroSIP or PBX guides for the device-specific fields.
Available seats and account limits depend on your account. Review any setup or recurring fee before adding an agent or line.
Match your device and SIP line settings
Open the selected SIP line and expand Technical endpoints. Copy the current regional hostname and supported transport settings. Use the hostname, not its IP address, for TLS or WSS.
- Password authentication: use the line’s SIP username and SIP password, not your Portal password.
- IP authentication: configure the public source IP your PBX uses. A change of source IP can prevent authorization; review it before moving the PBX or changing its network.
- Signaling and audio are separate: TLS protects signaling. Standard RTP is not encrypted; SDES-SRTP and DTLS-SRTP encrypt audio and must match the device’s supported mode.
The IllyVoIP webphone configures WSS and DTLS-SRTP automatically. For a third-party device, test outgoing calling, two-way audio and your incoming number’s saved destination separately. Registration alone does not route incoming numbers to that device. Never change an active line’s authentication or audio settings in the middle of a call.
Change a SIP line safely
Find the exact line using its name or SIP identity, then open its available actions. The main identity and an additional line may offer different actions; do not assume you can delete or reconfigure both in the same way. Review any subscription or deletion warning before confirming.
Changing a SIP password requires updating each device that uses it. Switching between password and IP authentication changes how that line connects: for IP mode, verify the actual public source address used by your PBX; for password mode, save the newly displayed credentials securely and update the device. Do not make authentication changes during active calls. Wait for the operation result before trying again, then check connectivity and the affected incoming destination separately.
Give each employee appropriate access
Open the agent's Actions menu and review the available permission controls. Give access to the tasks that person needs, rather than sharing the owner's login. Permissions control Portal capabilities; contact responsibility and contact sharing are separate settings. A SIP password is also separate from the employee's Portal login.
After saving a permission change, check the employee's actual view before relying on it. A missing control can reflect the employee's permissions, not a service failure. Caller ID and routing eligibility still follow the owner account and applicable package rules; granting a screen permission does not override them.
Map user permissions to the teammate's actual work
Begin with a short list of tasks the person needs to perform. A teammate who handles assigned contacts may need the workspace and relevant contact access. A supervisor may additionally need reports or monitoring. Someone who reviews reports does not necessarily need to edit contacts or access recordings.
- Open Contact Center → Agents and select the intended person.
- Open the profile or permissions action available to your account.
- Review the permission groups and select the capabilities required for that person's work. Check reading reports, accessing recordings, editing contacts and seeing full numbers separately where offered.
- Save the intended changes and reopen the agent to confirm them.
- Ask the teammate to check their own signed-in view at a safe point. Verify both the required task and the absence of access you deliberately withheld.
Do not use the owner's session as proof of what an agent can see. Owners and agents have different authority, and a visible menu is only one part of a workflow's access checks.
Separate access problems before changing permissions
If an agent cannot find a contact, first check responsibility and sharing as well as their contact permissions. If a report opens but a recording does not, check recording access and whether audio actually exists. If a call is refused, check its outcome and calling policy; granting another screen permission does not override a blocked destination, caller-ID requirement, package restriction or insufficient balance.
Portal user permissions, contact sharing and SIP credentials solve different problems. Changing a SIP password does not assign a Portal role, and giving a person a report permission does not supply device credentials. Make the smallest change that matches the missing task, then verify the teammate's actual view.
Remove an employee without losing track of their work
- Review active calls, assigned contacts, future appointments and campaign work before removing an agent.
- Choose Delete only for the intended agent and read the impact summary.
- Choose whether to unassign work or reassign it to another available agent. Review the displayed treatment of ownership, shared contacts, appointments and campaigns.
- Confirm once and wait for the result. If cleanup is incomplete, follow the displayed retry instructions instead of creating a replacement immediately.
Removal revokes the agent's access and credentials; historical activity is retained. It is not a way to erase past calls or support conversations. Check any phone-number or queue destination that used the employee so future callers still reach the right team.
Reviewed 10 October 2026 against the current IllyVoIP Portal and service implementation. Available controls depend on account access and service state.