
MagnusBilling को IllyVoIP के साथ सेट करें
वर्तमान Portal: खोलें Services → SIP Lines और चुनी पहचान के SIP विवरण देखें। डिवाइस का authentication, signaling transport और call audio उससे मिलाएँ। पुराने screenshots पिछला संस्करण दिखाते हैं। अपने credentials और वर्तमान regional server का इस्तेमाल करें। निजी जानकारी छिपाई गई है।
MagnusBilling एक open-source VoIP billing system है, जिससे आप SIP trunks, providers, DID और routing सँभालते हैं। इसे VoIP व्यवसाय, call centers और service providers इस्तेमाल करते हैं ताकि billing automatic हो, usage देखा जाए और routes सुधरें.
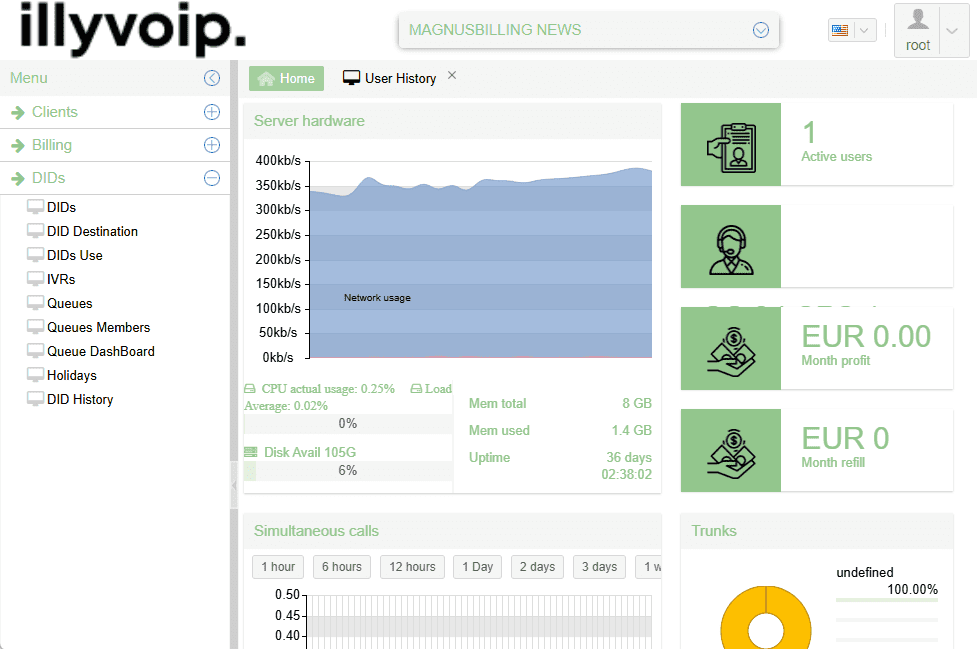
मुख्य सुविधाएँ
- VoIP accounts सँभालें users और clients के लिए।
- SIP trunks बनाएँ और सेट करें providers के साथ, जैसे ILLYVOIP.
- Incoming और outgoing routes बनाएँ call handling के लिए।
- Billing और balance deductions automatic करें duration/rates के अनुसार।
- Live call logs और reports देखें activity और usage के लिए।
- VoIP reseller बनें यह सेवा देकर: ILLYVOIP और MagnusBilling से प्रबंधन करके।
जब आप MagnusBilling को Illyvoip से जोड़ते हैं, तो VoIP services दोबारा बेच सकते हैं, clients और pricing सँभालकर व्यवसाय बढ़ा सकते हैं provider infrastructure का उपयोग करते हुए।
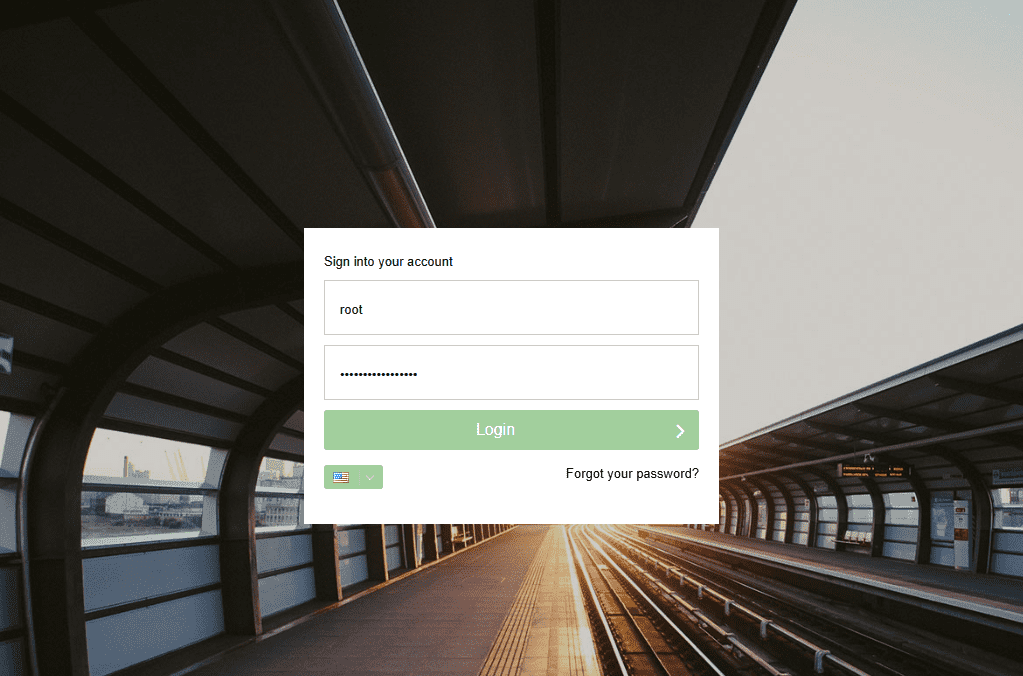
चरण 1: MagnusBilling लॉगिन
अपनी installation का administrator URL खोलकर उसके credentials इस्तेमाल करें। Public access से पहले default credentials बदलें।
- Username: आपका MagnusBilling administrator username।
- Password: चुने account का अपना password लें।
चरण 2: नया user
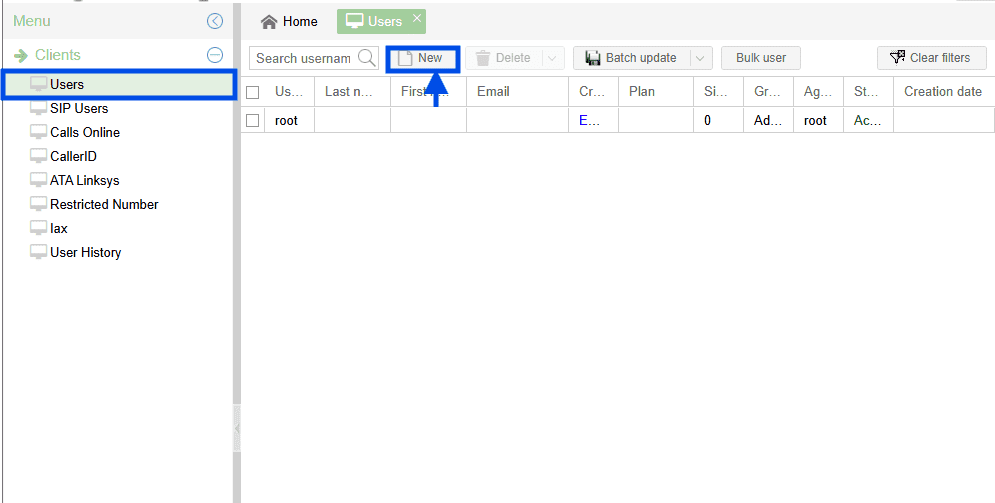
एक user (client) बनाएँ ताकि plan और SIP दें:
- Clients -> Users -> New
- चुनें Client user group के रूप में।
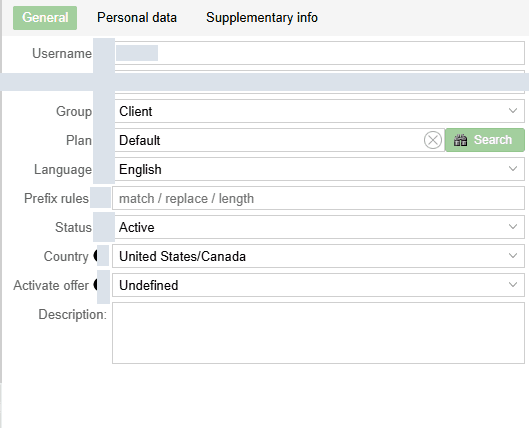
अभी default plan लें; custom rate plan बाद में बनाएँ।
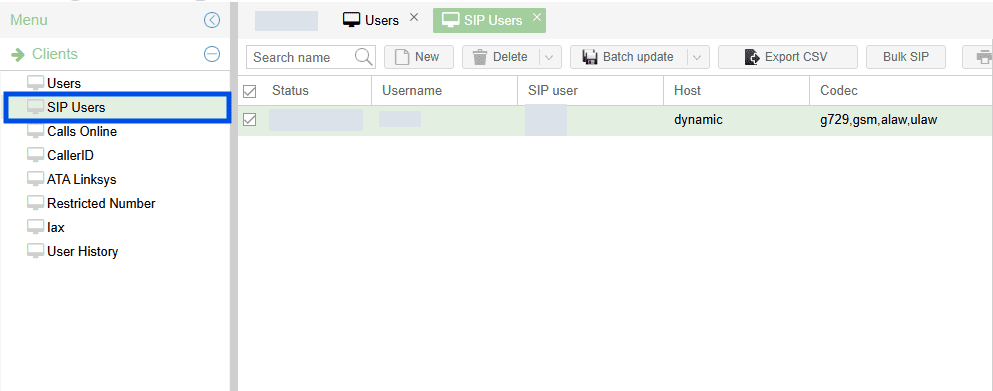
SIP account टेस्ट
MagnusBilling हर user के लिए SIP account बनाता है। Zoiper या compatible SIP softphone से टेस्ट करें।
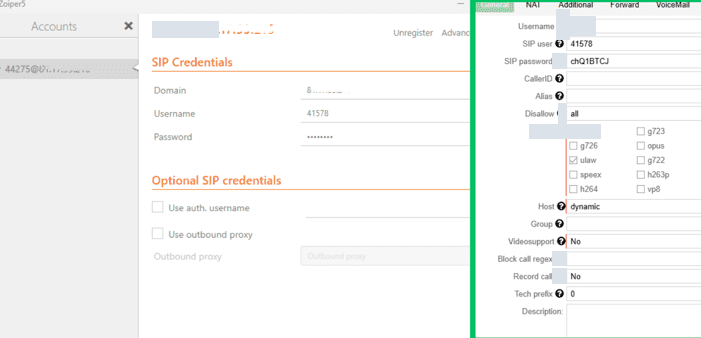
भरें:
- Domain:
अपने MagnusBilling server का address - Username:
41578 - Password: चुने account का अपना password लें।
क्लिक करें Register.
सफल होने पर SIP status दिखाता है OK.
पूरी Zoiper गाइड: SIP user से Zoiper सेट करें.
Test call से पहले बनाएँ Provider: Routes -> Providers -> New
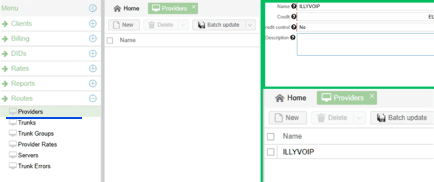
Provider fields
- Name: Illyvoip
- Credit: Provider के पास उपलब्ध funds देखें।
- Credit Control: खर्च और बचा balance देखें।
- Description: Provider के बारे में नोट।
क्लिक करें Save.
SIP trunk जोड़ना
Routes -> Trunks -> New -> अपना ILLYVOIP trunk incoming/outgoing के लिए जोड़ें।
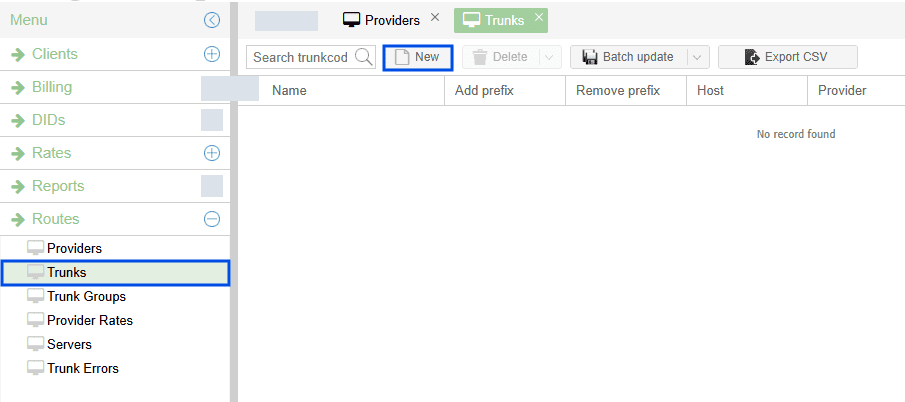
SIP details लें
- लॉगिन करें ILLYVOIP.
- खोलें SIP Lines.
- कॉपी करें SIP Username, Password और Domain.
- इन्हें इस्तेमाल करें Magnus Trunk.
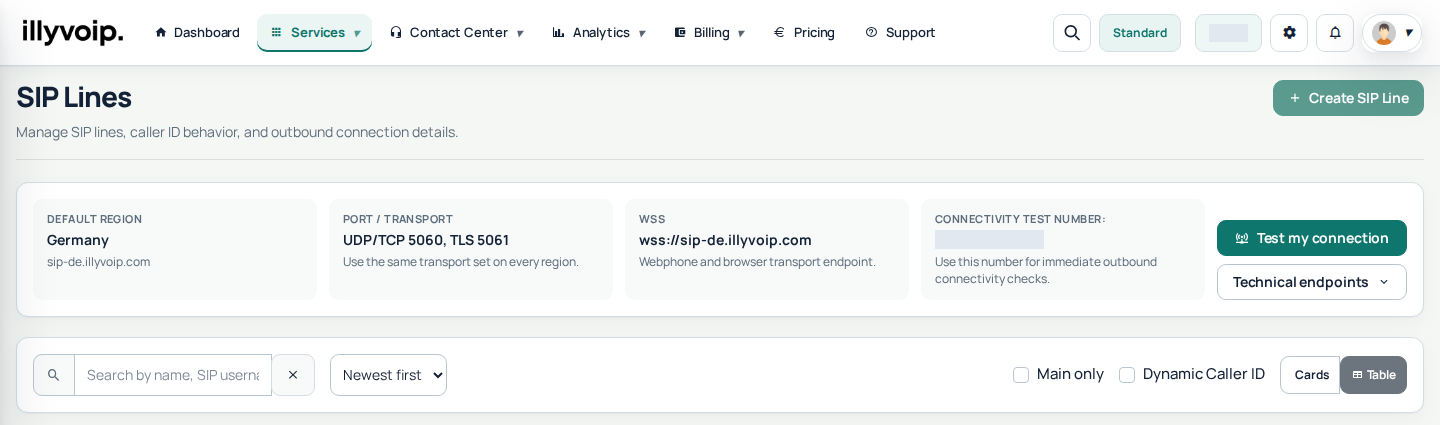
Current Portal में Services → SIP Lines से identity/auth mode सँभालें। SIP lines और agent accounts अलग विकल्प हैं; पुराने Convert to Trunk की ज़रूरत नहीं।
SIP User और SIP Trunk का अंतर
- SIP identity: device/PBX के credentials या source-IP authorization।
- SIP trunk: PBX extensions की calls का connection, account/device limits के भीतर।
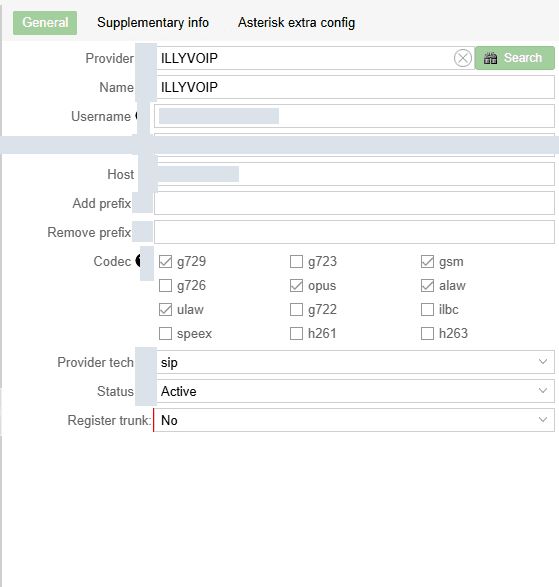
Trunk fields (उदाहरण)
- Provider: ILLYVOIP
- Name: ILLYVOIP
- Username: आपका SIP username
- Password: चुने account का अपना password लें।
- Host/IP: जैसे
Portal में दिखा SIP server - Prefix (optional): उपलब्ध package का वर्तमान technical prefix कॉपी करें। पुराने Platinum/Premium उदाहरण न लें।

IP authentication इस्तेमाल करें
Trunk सेट करें IP authentication:
- खोलें अपना SIP Account IllyVoIP पर।
- सही लाइन में Actions और IP-auth विकल्प उपलब्ध हो तो चुनें। PBX का public source IP भरें और save से पहले जाँचें।
- भरें अपना server IP address.
- इसमें MagnusBilling, केवल भरें Host (SIP Server).
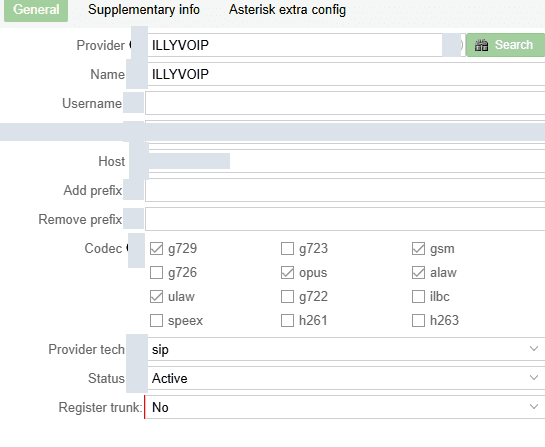
सही configuration पर ILLYVOIP trunk Active दिखाता है.
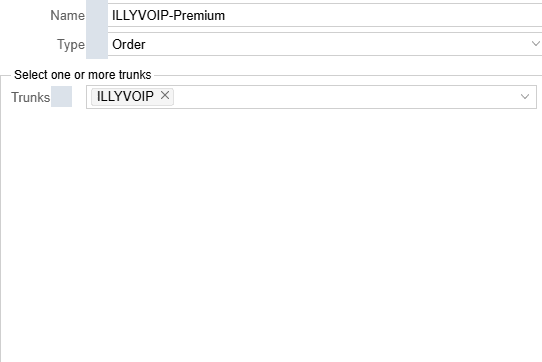
बनाएँ Trunk Groups: Routes -> Trunk Groups -> New
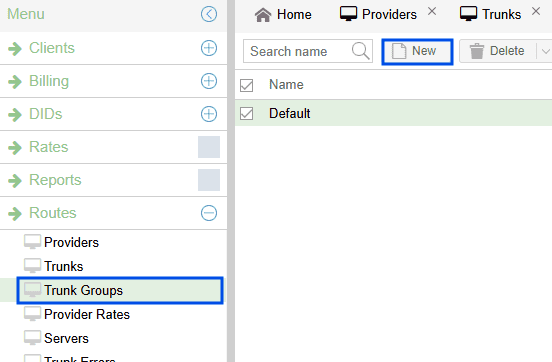
Group configuration
- Name: ILLYVOIP-Premium
- Type: Order
- Trunks: ILLYVOIP
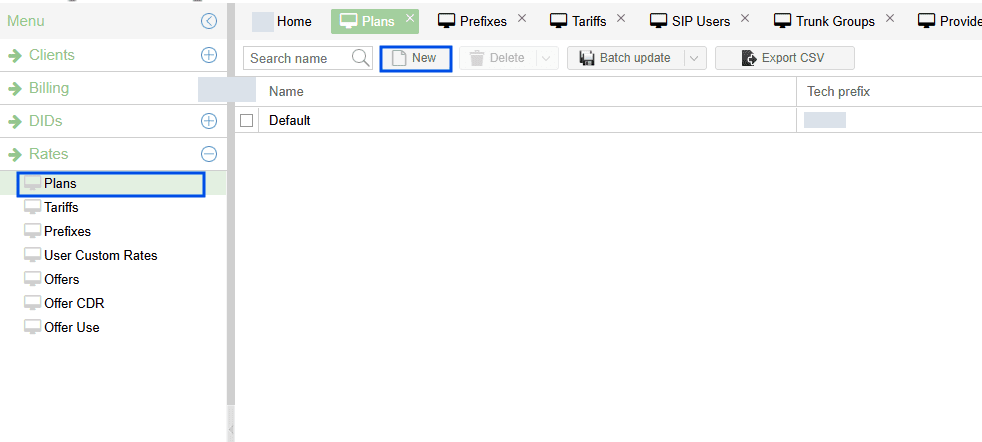
नया plan
- Rates -> Plans -> New
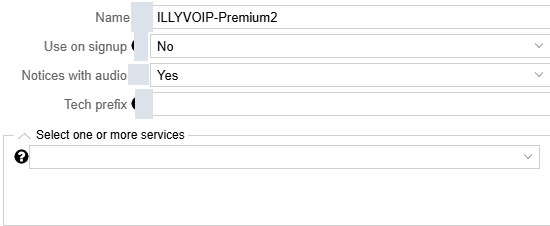
- Name: ILLYVOIP-Premium
- Use on signup: वैकल्पिक
- Notices with audio: Yes/No (हाँ/नहीं)
- Tech Prefix: वैकल्पिक
Prefixes सेट करें
- Rates -> Prefixes -> New
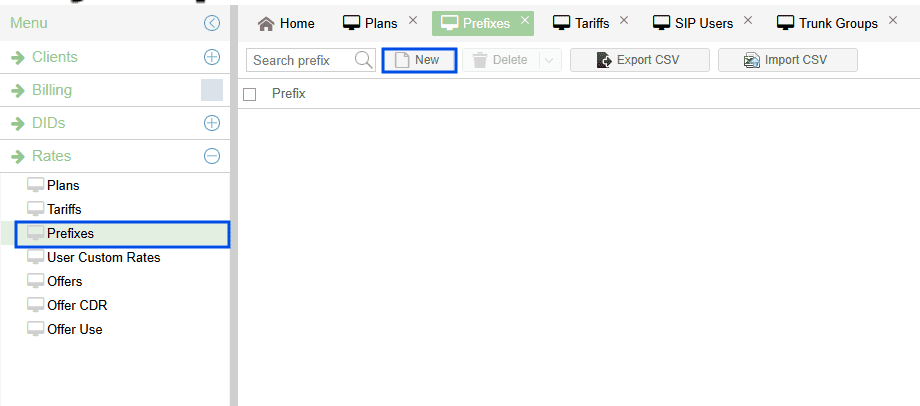
Prefixes और tariffs CSV से bulk में या manually जोड़ सकते हैं:

Tariffs सेट करें
Rates -> Tariffs -> New
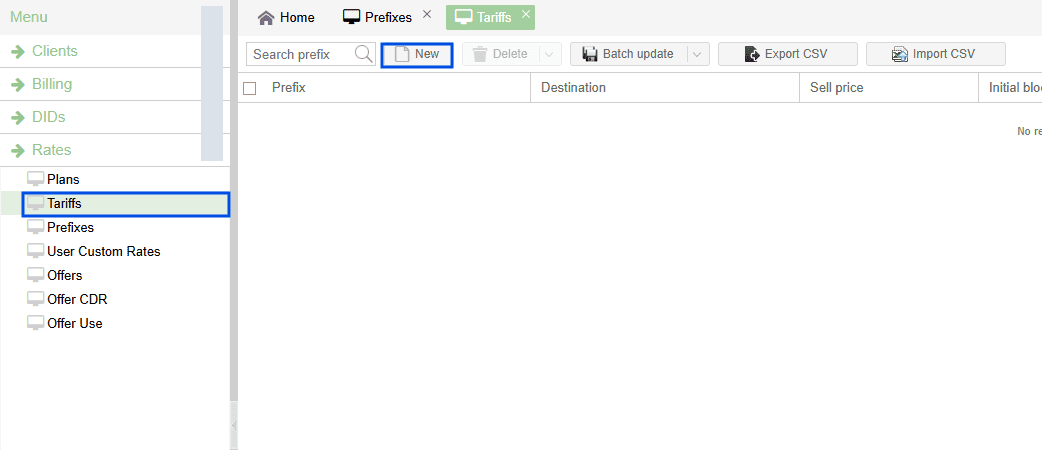
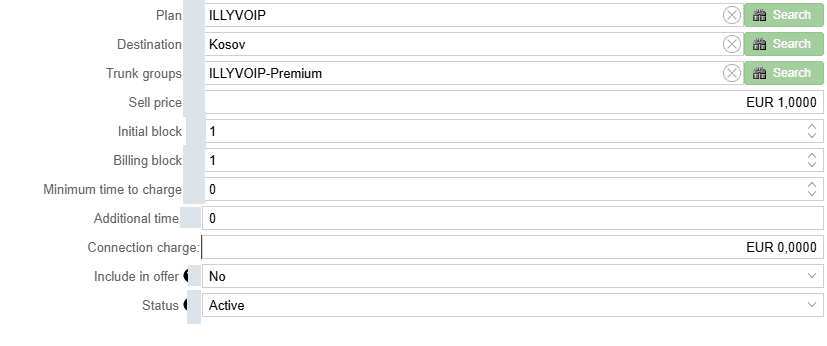
Prefix destinations के tariffs
- Plan: ILLYVOIP
- Destination: चुना prefix, जैसे 383 Kosovo
- Trunk Groups: ILLYVOIP-Premium
- Sell Price: प्रति मिनट
- Initial/Billing Block: जैसे 1/1
अंतिम सेटिंग और टेस्ट
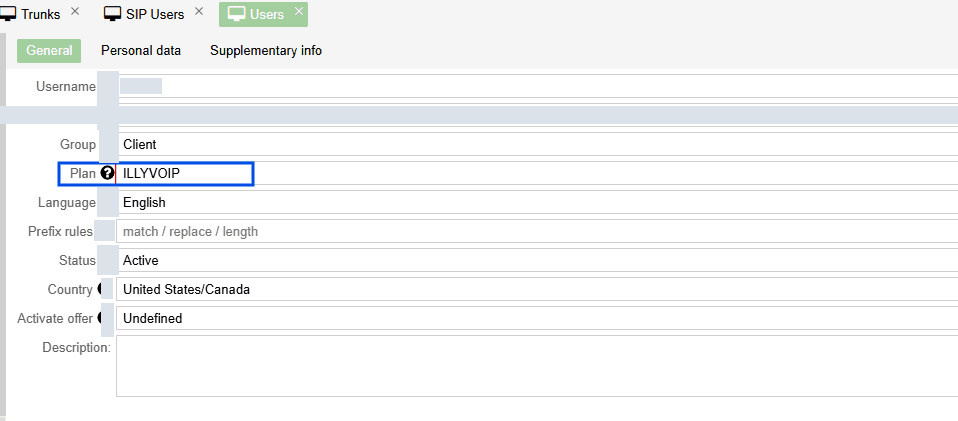
- User routing plan अपडेट करें ताकि आपके plans/trunks इस्तेमाल हों।
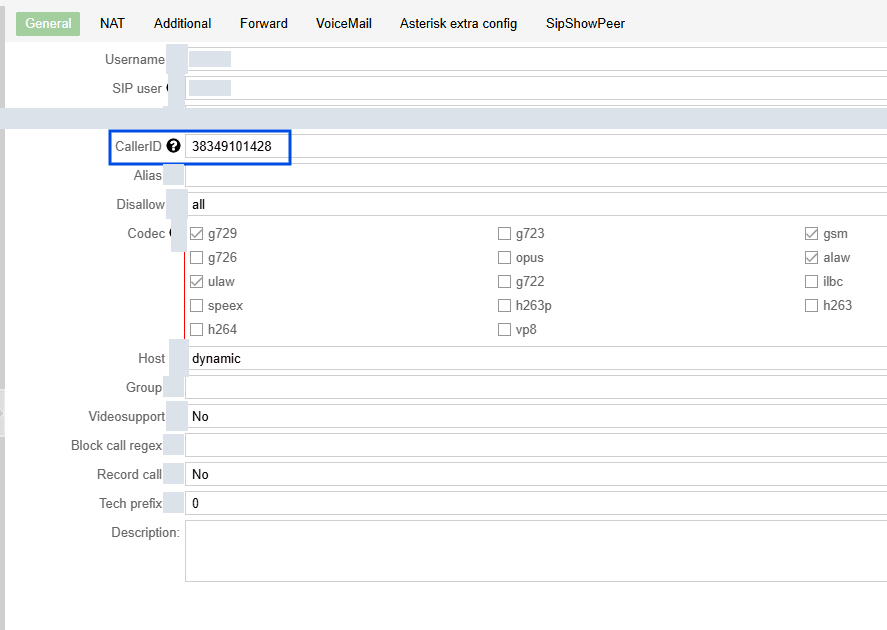
- Caller ID दें SIP user को।
User credit सुनिश्चित करें
वरना दिखेगा Balance Empty.
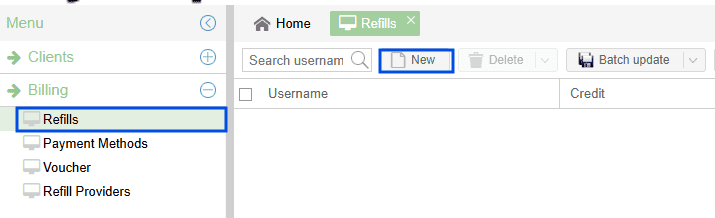
- Billing -> Refills -> New
User को credit
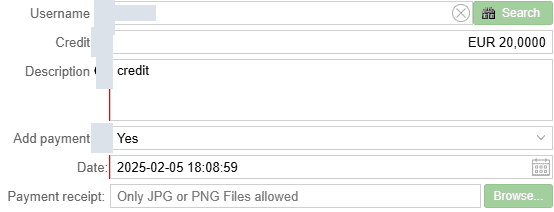
- Username: user चुनें
- Credit: रकम
- Description: नोट
- Add Payment: Yes paid चिह्नित करने के लिए
टेस्ट कॉल करना
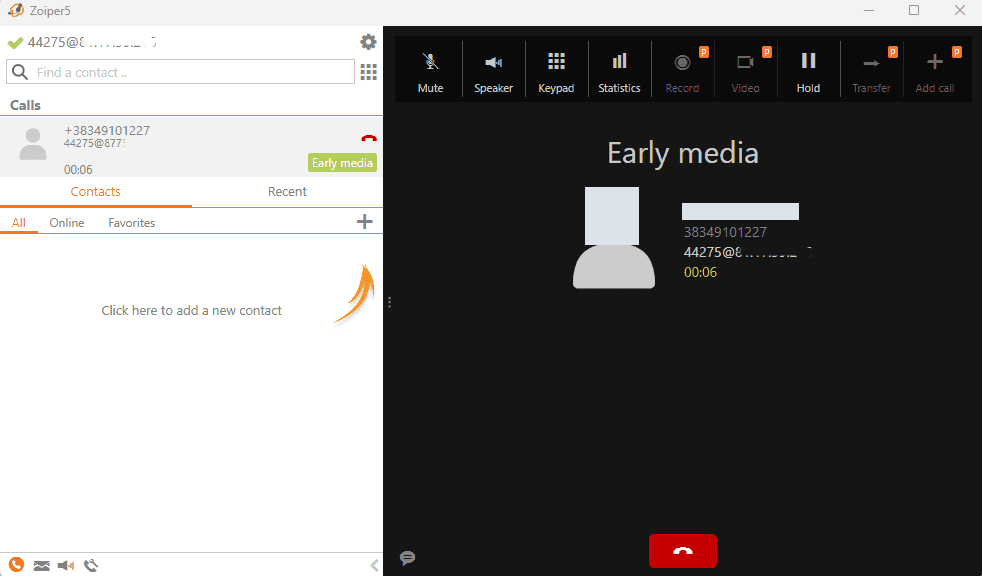
एक टेस्ट कॉल करें।
सही configuration पर कॉल connect होनी चाहिए।
MagnusBilling में DID
IllyVoIP DID के चरण
DID assign करें
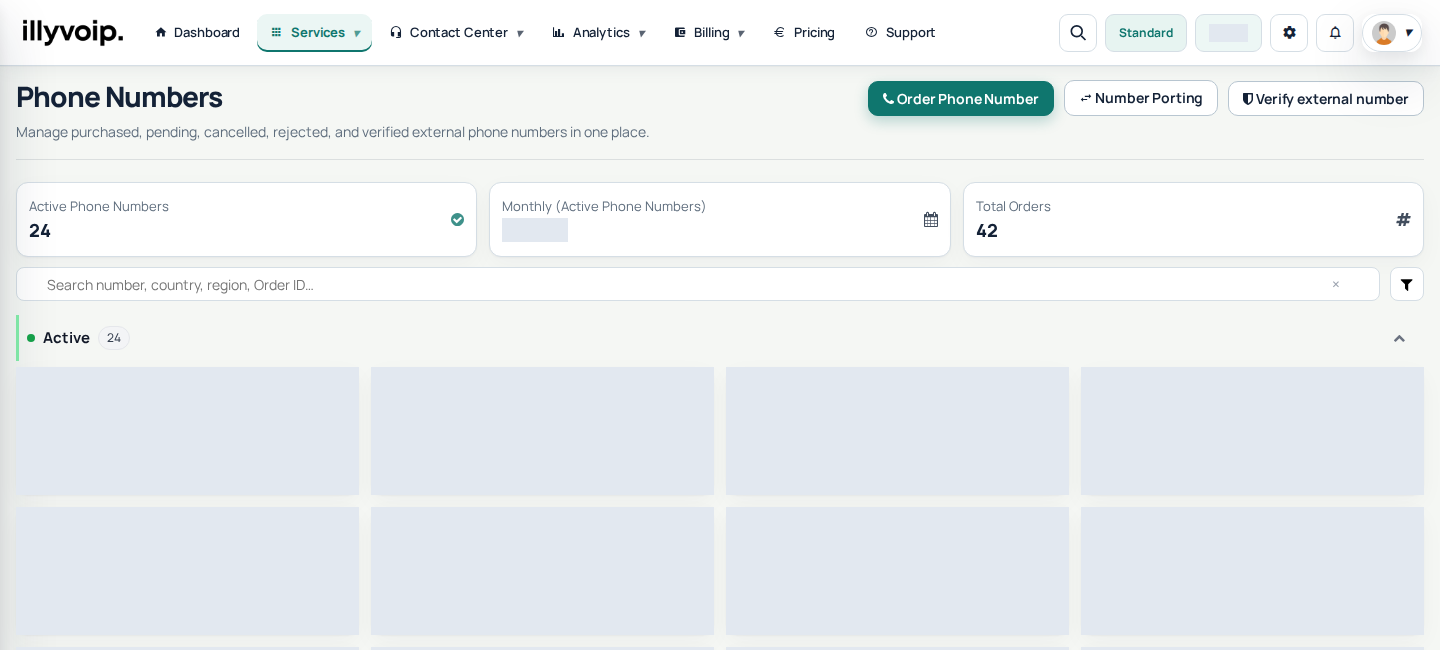
- IllyVoIP में -> Phone Numbers.
- अपना active चुनें: DID -> Actions -> Configure.
- चुनें External SIP servers ताकि incoming MagnusBilling तक जाए।
MagnusBilling DID सेट करें
- DIDs -> New
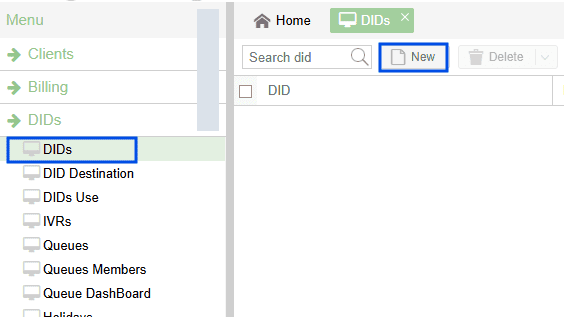
कम से कम भरें DID Number, Country और सेट करें Status Active पर।
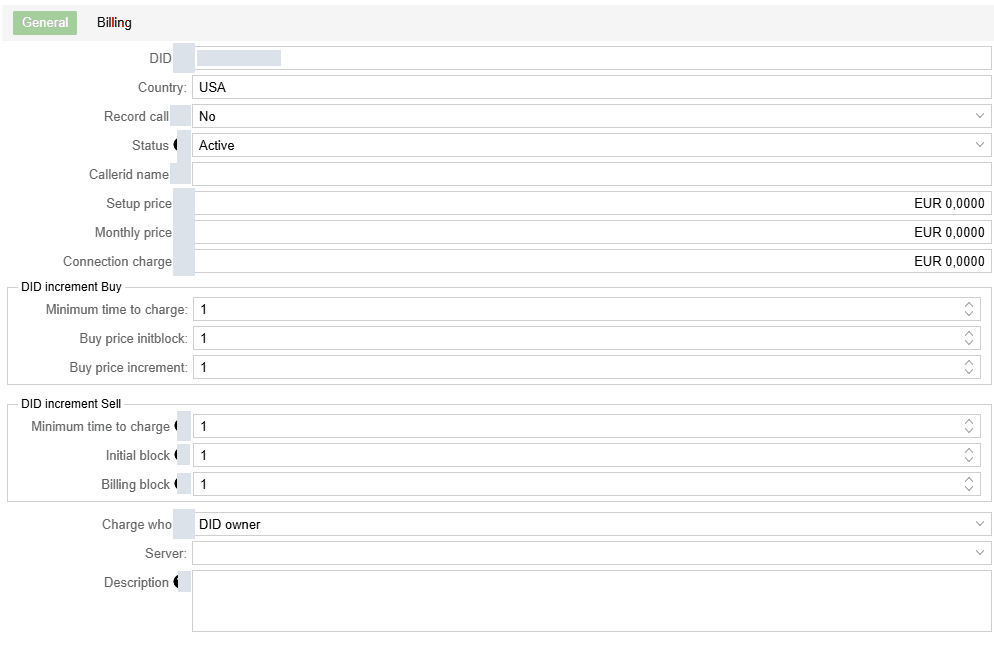
सुझाव: पूरा करें billing details (Setup, Monthly, Connection Charge) और सेट करें Caller ID, DID increments तथा Server.
सफल होने पर Number status दिखाता है Active.
अब DID का destination सेट करें जहाँ incoming जाए।
DID destination सेटिंग
- सूची से अपना DID चुनें।
- भरें Username उस SIP user का जो receive करेगा।
- सेट करें Status इस पर Active.
- Priority: 1 या ज़रूरत अनुसार।
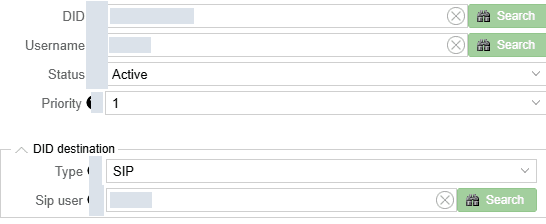
क्लिक करें Yes save करने के लिए। Zoiper extension पर incoming आनी चाहिए।
DID टेस्ट
Mobile SIM से DID पर कॉल करें।
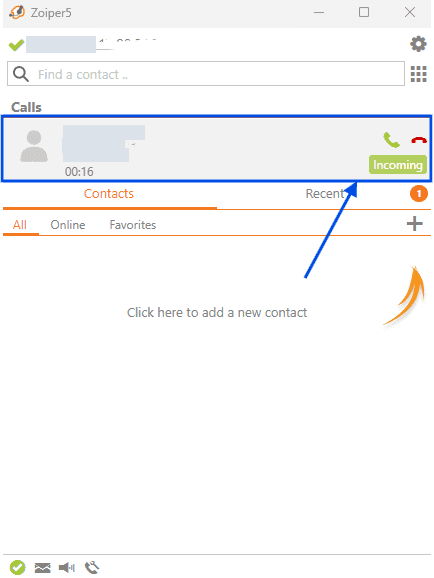
Zoiper 5 extension पर कॉल आनी चाहिए। मदद के लिए Support से पूछें।