
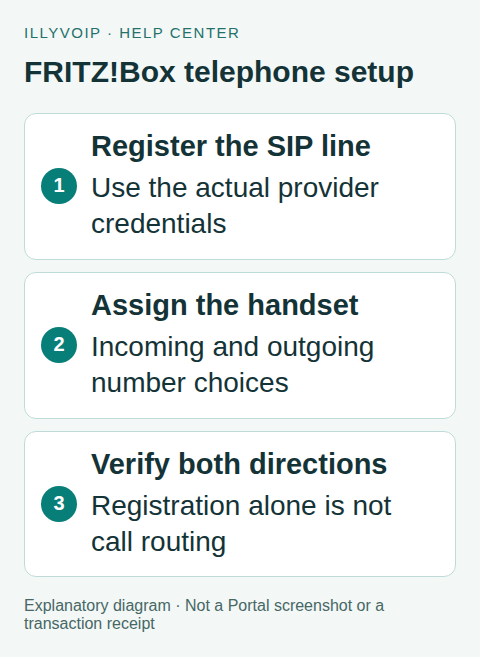
Configure IllyVoIP as an internet telephony account on a FRITZ!Box 7590, then assign that account to the telephone that should use it. Provider registration, handset assignment and the IllyVoIP incoming-number destination are separate settings; check each one.
This guide follows the 7590’s official instructions for its current FRITZ!OS interface. Record your installed firmware and use the matching vendor help if labels differ. ISP-supplied firmware can restrict adding or editing providers. Do not assume this procedure applies to a model without the same telephony features.
1. Prepare the identity and preserve the existing setup
Use a password-authenticated SIP line intended for this router. From Services → SIP Lines in IllyVoIP, obtain the actual SIP username, password and server/domain information. Check the line’s audio mode and outgoing caller-ID/package restrictions.
Keep a private configuration backup and record the existing telephone assignments. Do not delete your ISP’s working account, change the broadband connection or factory-reset the router. If another PBX already uses the SIP identity, prepare a separate intended identity or review the consequences of another registration.
For incoming calls you also need an active IllyVoIP number routed to this identity. Do not confuse the public number, the router’s local label, the SIP authentication username and an internal handset number.
2. Add the provider account
Open the router’s local administration interface securely. Go to Telephony → Telephone Numbers and choose New Telephone Number. Select Other provider when IllyVoIP is not listed. Provider choices depend on the router’s country/firmware settings.
Use the current line values for the registrar and authentication fields. Enter the SIP password privately. Where the form distinguishes the telephone number from the username used for authentication, keep those roles separate. Use the real number assigned to this setup where a public number is requested; do not turn a router form field into a claim that a number has been purchased.
The vendor’s provider form can expose additional registration options. If it offers “Use telephone number for registration,” compare the resulting SIP identity with your actual IllyVoIP username rather than blindly toggling it. Do not copy another provider’s registrar, proxy or login conventions. If the fields cannot represent the supplied account details, stop and seek guidance for that firmware.
3. Review dialing and transport behavior
Review the location and number-formatting settings because a router can prepend an area code to locally dialed numbers. Begin acceptance with a complete international destination and verify the number that reached Call Reports. Avoid adding country codes both in the handset’s contacts and again through an unintended routing rule.
Use only signaling and media modes documented for both the installed FRITZ!OS and the current IllyVoIP endpoint. A TLS option does not prove that the router uses the matching SRTP mode. If the required media combination is unavailable, do not save a mismatched setup or call it secure.
Do not change emergency-number handling based on a generic provider example. This guide does not establish emergency-call availability. Preserve a known working emergency-calling arrangement and ask Support about service availability separately; never place an emergency test call.
4. Save and inspect registration
Complete the account wizard and review its connection result. If registration fails, inspect the error/event information and compare the registrar, username, password, transport and required domain. A router that can browse the web is not necessarily permitted to reach every SIP endpoint.
If the device uses a separate ISP telephony connection, the vendor offers an option to register other-provider accounts through the ordinary internet connection. Apply that only when it matches your actual setup and the vendor’s instructions. Do not replace the router’s WAN configuration as a trial-and-error fix.
5. Assign the telephone deliberately
In Telephony → Telephony Devices, edit the intended attached or DECT telephone. Select the IllyVoIP account for outgoing calls if that is the desired route. Choose which incoming account(s) should ring that telephone. Preserve assignments for other household or business users.
A provider account may register while no handset is assigned to answer it. Conversely, selecting an outgoing account does not configure an IllyVoIP number’s destination. Check the saved assignments before testing.
6. Verify outgoing and incoming calls
- Call one authorized international destination from the chosen telephone. Ordinary charges can apply.
- Confirm the actual dialed number, caller ID and two-way audio.
- If required, check keypad tones with an agreed test menu.
- In IllyVoIP, confirm the active incoming number points to the same SIP identity.
- Call that number with permission and check which handset rings, answer and verify both audio directions.
If outgoing calls work but incoming calls do not, review the IllyVoIP destination and router handset assignments before recreating the provider account. If registration succeeds but outgoing calls fail, inspect the actual call result and account/package rules.
Troubleshooting and recovery
Keep a working/failing comparison, firmware version, time/timezone and public call reference. Restore only the settings changed for this setup if it fails; do not erase unrelated provider accounts. Send Support sanitized fields and errors rather than a full router backup containing credentials.
Frequently asked questions
Does IllyVoIP need to appear in the provider dropdown?
No preset is assumed here. The guide uses the router’s custom-provider fields and your actual SIP details.
Can I apply this to every FRITZ!Box?
No. Check the exact model, telephony capabilities and firmware restrictions first.
Related guides and references
- Configure gigaset n670 ip pro
- Configure yealink w70b dect
- Official reference: fritz.com
- Official reference: illyvoip.com
Reviewed 8 October 2026 against current IllyVoIP source and official documentation. Configuration examples are not evidence of a completed hardware or live integration test. Use the current options and limits available to your account.