
A cordless handset needs two different connections: a DECT link to its base, and a SIP account registered by the base to IllyVoIP. A handset can be paired correctly and still be unable to make an external call. This guide follows the W70B single-base interface; do not apply its menu paths unchanged to a W80/W90 multicell installation.
Using a W73P kit: W70B base plus W73H handset
Yealink W73P is the kit name for a W70B base and W73H handset. Configure SIP on the W70B; the handset joins that base over DECT. The kit does not contain a separate SIP server or an IllyVoIP subscription.
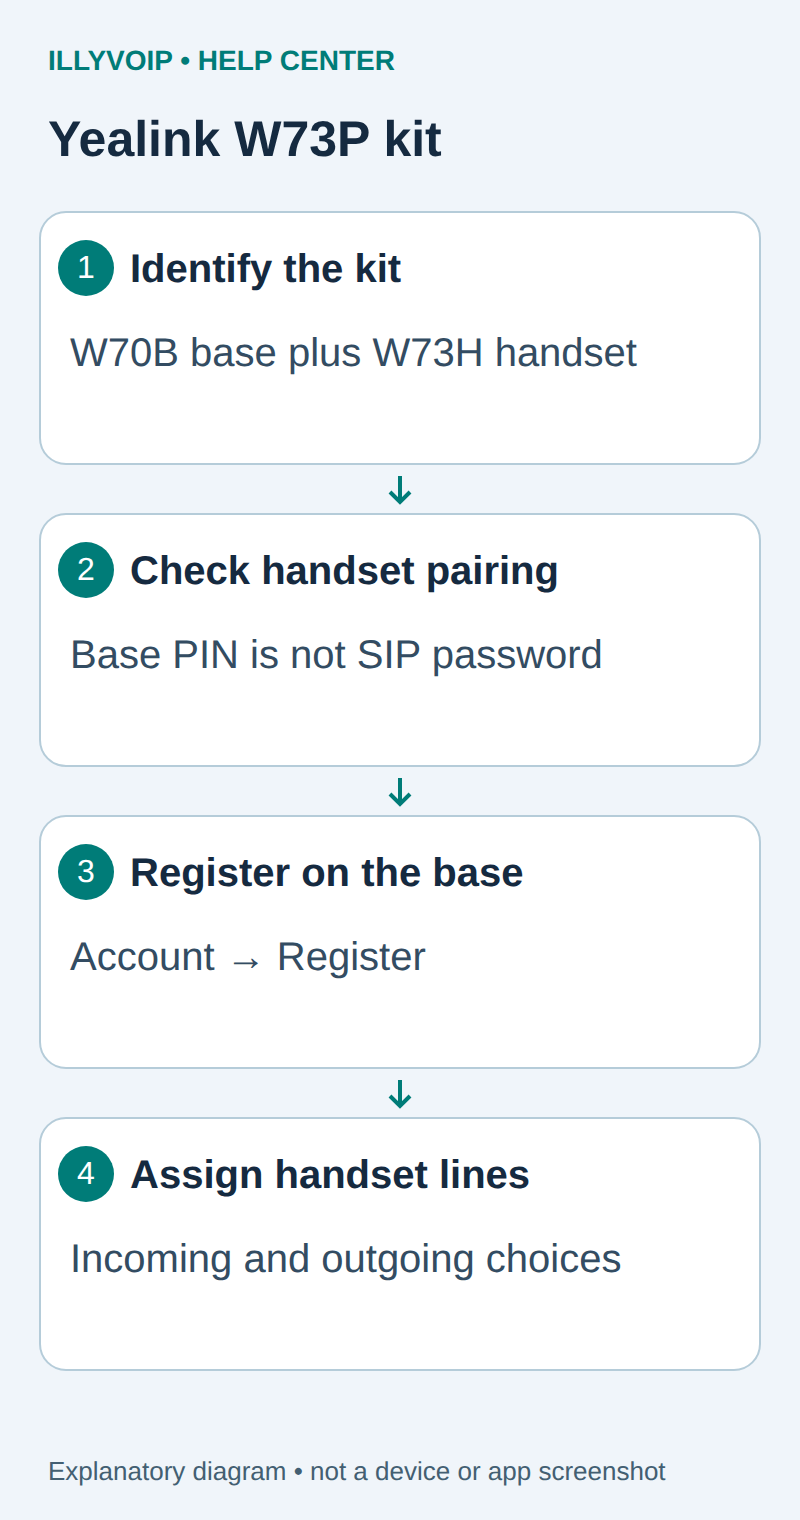
- Connect and power the W70B on the trusted network. Charge the W73H and keep it near the base.
- If the supplied handset already shows the intended base as registered, preserve that pairing and continue to the account setup. Re-registration is not automatically required for a kit.
- Otherwise, open the W70B's handset registration window. On the W73H, use its registration shortcut or OK → Settings → Registration → Register Handset, select the intended base and enter the configured base PIN.
- After subscription, use OK → Status → Base on the W73H to read the base address. Open that address from the management network.
- Use Account → Register for the IllyVoIP account. Enter the user and authentication names, SIP password, server, destination port and matching transport as described below.
- Use Account → Number Assignment to choose this W73H's outgoing and incoming line assignments. Save and test both directions on this exact handset.
If several W73H handsets are present, identify each one before assigning lines. A handset showing DECT signal bars can still have no usable SIP account. Likewise, a base with one registered account may ring a different handset because of Number Assignment.
When replacing a handset, preserve the base's working SIP configuration. Pair the replacement and review its number assignment rather than resetting the base and disrupting every other handset. Close the registration window when finished.
Follow the remaining checks below before adding more devices. Handset compatibility and firmware requirements should be checked against Yealink's current matrix; single-base success does not establish W90 multicell support or additional call capacity.
References: W70B device initialization and W73H status path and W73P kit description. Expansion reviewed October 11, 2026.
Prepare the IllyVoIP line
Open SIP Lines and obtain the SIP username, SIP password and server for the line you intend to connect. These are not your Portal email and login password. This walkthrough uses password authentication. If the existing line uses IP authentication, do not switch modes without checking which devices depend on it.
A separate device can use a separate SIP line; review any subscription charge before confirming. Keep a note of which device uses each line, but do not put passwords in shared documents. When replacing a working phone, keep its configuration privately so you have a way back if the new setup needs troubleshooting.
Start with one handset and one line
Connect the base to your trusted network and power it with a supported supply. Charge the handset and keep it near the base for the first setup. Before adding several handsets, decide which one should receive calls to your number and which line it should use for outgoing calls. Proving one simple combination first makes later troubleshooting much easier.
Pair the handset with the base
Put the W70B into registration mode with its registration button. On a compatible handset, use Reg or OK → Register Handset, select the intended base and enter its PIN when requested. This is the base PIN, not the IllyVoIP SIP password. If pairing fails, check range, PIN and whether registration mode is still open. Follow the official pairing instructions for your handset.
Register the SIP account on the W70B
For supported W-series handsets, OK → Status → Base shows the base IP. Open it in a local browser and sign in as the device administrator. Go to Account → Register, select an unused account, enable Line Active and enter the SIP credentials. See the account-registration reference.
| Field | What to enter |
|---|---|
| User Name / Register Name | SIP username / authentication ID from your line |
| Password | SIP password, not base PIN |
| Server Host | IllyVoIP SIP server |
| Label | A recognizable local line name |
Choose which handset calls out and which one rings
Open Account → Number Assignment. Assign the intended outgoing and incoming line to your handset, then save. Treat these as two decisions: selecting an outgoing line does not by itself prove that incoming calls will ring the same handset. Check both directions before adding another handset.
For example, a reception handset and an office handset may share an incoming number but use different outgoing lines. First write down the desired behavior, then configure it. Do not assume that adding a handset gives the IllyVoIP account another simultaneous-call allowance.
Find the failing stage
- Handset cannot see the base: resolve pairing and coverage first. Changing the SIP password cannot repair that link.
- Base is reachable but SIP is unregistered: check the account details and server.
- Registered, but the wrong handset rings: check Number Assignment and the number’s destination in IllyVoIP.
- Only outgoing calls work: test the incoming assignment separately and check handset Do Not Disturb.
Match signaling and audio settings
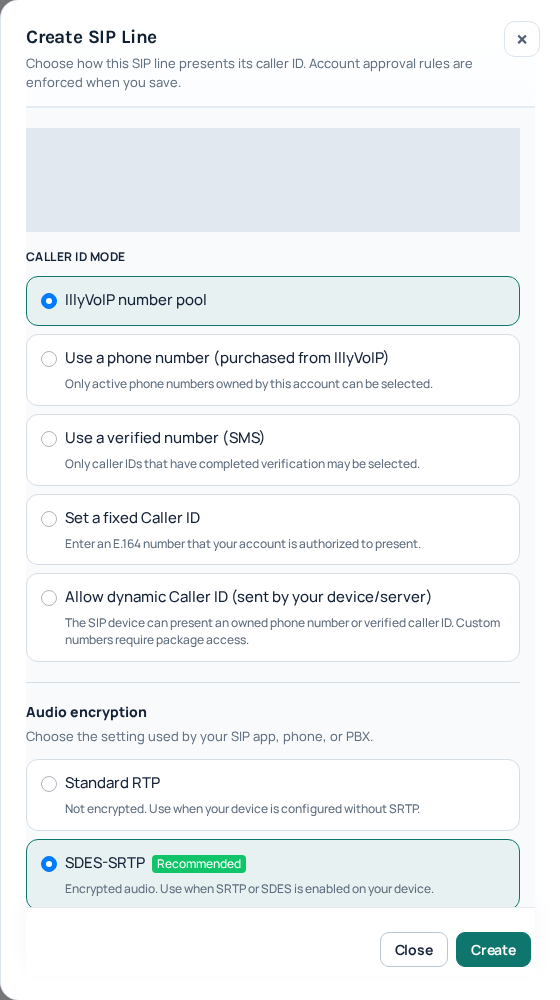
Use the server, destination port and transport supplied for your line. The device’s local IP opens its administration page; it is not the IllyVoIP server address. SIP signaling and audio encryption are separate choices. The Portal audio mode must match the device’s supported configuration: Standard RTP, SDES-SRTP or DTLS-SRTP. Do not change encryption just because an unrelated tutorial uses another setting.
Keep the administration page on a trusted network. Do not expose it to the Internet or disable a firewall to make a test work. If your model does not offer a required option, ask about that exact model and firmware instead of changing several unrelated settings at once.
Verify the result one step at a time
- Registration: check the device’s account status. A familiar name on its screen is not proof that it is registered.
- Outgoing call: select the IllyVoIP line and call a number you control in international format. Check balance and destination rates first; the test may be chargeable.
- Audio and identity: speak in both directions and check the outgoing caller ID. Editing a local display name does not grant permission to use another number.
- Incoming call: route an active phone number to this SIP line and call it from another device. SIP registration does not automatically choose a number’s incoming destination.
What to check before contacting Support
If registration fails, check the line details before changing the network. If registration succeeds but a call is rejected, check number format, balance, routing package and permitted caller ID. If the call connects without audio, report that distinction: it is a different problem from failure to register.
Include the device model, firmware version, time and timezone, visible error and public call reference where available. The SIP response-code guide helps explain errors. Never send passwords, unmasked configuration exports or screenshots containing customer data.
Documentation and scope
Device configuration reference. Menu paths were checked against documentation and Portal steps against IllyVoIP. This is not physical-device certification; the Portal screenshot is not a screenshot of the phone administration interface.