
PhonerLite can act as a Windows SIP client for an IllyVoIP password-authenticated SIP line. Create a dedicated profile, copy the connection values for that line, and verify registration, outgoing calling and incoming routing separately.
The official stable download listed version 3.45 when this guide was reviewed. Use the official Windows package and its matching documentation; do not use a beta simply because its version is higher. This guide does not claim a physical-device or live-call certification.
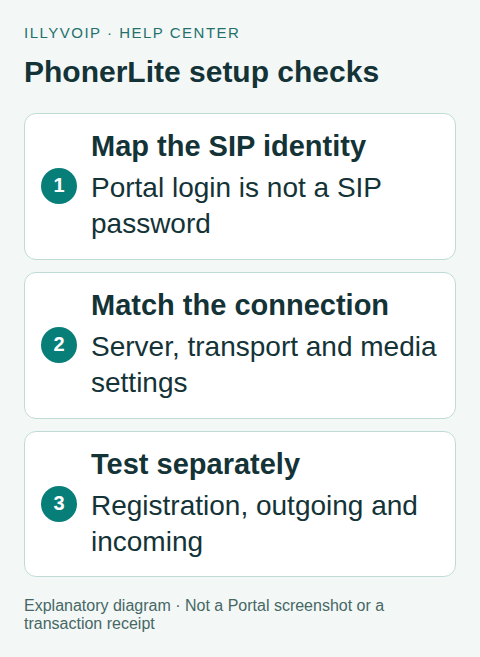
1. Prepare the IllyVoIP SIP line
Open Services → SIP Lines and select the intended identity. Confirm it uses password authentication and obtain its SIP username, SIP password and current server information through the authorized Portal controls. Your Portal login email and password are not SIP credentials.
Record the line’s audio-encryption choice and supported connection details. Check the caller-ID and package rules for your intended outgoing calls. If the identity already serves a phone or PBX, consider a separate line rather than creating competing registrations. Do not switch an active IP-authenticated trunk into password mode just for this setup.
2. Create a PhonerLite profile
Install the official stable package appropriate to your Windows system. Open PhonerLite’s Configuration area and create a profile with New. Give it a recognizable local name. Keep existing profiles until the new configuration is verified.
Map values deliberately:
- Proxy/Registrar: your actual IllyVoIP SIP server hostname and the appropriate port if required.
- Username: the SIP username for the selected line.
- Authentication Name: use the line’s authentication identity; where the same SIP username is used, keep the mapping consistent.
- Password: the SIP line password, entered privately.
- Realm/Domain: use the provided SIP domain where it differs from the registrar; do not insert the Portal website address.
- Register: enable registration for this password-authenticated client.
A Displayed Name is not authorization to present an arbitrary caller ID. The account’s outgoing identity rules still apply. Save the profile and confirm it is the active one; changing a profile that is not active will not change the current phone.
3. Match signaling and media settings
In the network configuration, select the intended Preferred Connection Type. Use the endpoint information currently offered for the line. If configuring TLS, use the supported hostname and certificate validation; replacing it with a guessed IP can break validation.
Review the Codecs settings against the line’s supported choices. Start with an explicitly shared codec such as G.711 A-law or µ-law when available on both sides. A codec listed by PhonerLite is not proof it is enabled on your IllyVoIP line.
Match PhonerLite’s media-encryption configuration to the Portal line. Standard RTP and SDES-SRTP are different. Do not enable ZRTP on the assumption that every secure-audio option is interchangeable. If your version does not offer a verified matching configuration, stop and use the supported setup guidance rather than accepting an unencrypted fallback as success.
Do not automatically enable UPnP, add a public STUN server, or open broad router ports because a generic softphone guide mentions them. Preserve your network policy and investigate a demonstrated reachability problem separately.
4. Confirm registration before dialing
After saving, inspect PhonerLite’s registration status. If it fails, check the active profile, exact SIP username/authentication name, server, port, transport and password. Avoid repeatedly trying variations that might trigger account protection.
Keep any diagnostic log private: profiles and logs may expose reusable account information. Share only a sanitized error, version and timestamp with Support. Registration success confirms the client registered; it does not establish the outgoing call permission, destination price or incoming number route.
5. Check one outgoing call
Select the intended Windows microphone and speaker, then place one authorized test to a number you control in international format. Confirm the called party hears you and you hear them. Check the displayed outgoing identity and try a harmless keypad menu if that is required by your workflow.
Normal call charges can apply. If the call is rejected, inspect Call Reports and the specific response rather than recreating the whole profile. If it connects without two-way audio, use the audio troubleshooting guide and compare the media settings.
6. Configure incoming calls separately
If you own an active incoming number, open its destination settings and route it to the intended SIP identity. Ensure PhonerLite is running and the profile is registered. Call the number with permission and check ringing, answering and both audio directions.
A registered softphone does not automatically receive every number in the account. If it does not ring, inspect the number’s saved destination, line identity and any competing registrations before changing PhonerLite settings.
Maintain the configuration
Protect the Windows account and PhonerLite configuration files. Do not export or share a complete profile as a support attachment. Recheck the connection after a SIP password, server, network or software change, and close the client deliberately when you no longer intend it to receive calls.
Frequently asked questions
Can I use several profiles at once?
PhonerLite supports stored profiles, but its documentation describes one active profile at a time. Confirm which one is selected before interpreting a registration or call result.
Will calls ring when the computer is asleep?
Do not rely on a sleeping or disconnected computer as a reachable SIP endpoint. Test the operating conditions you actually intend to use.
Related guides and references
- How to configure microsip
- How to install and use x lite
- Official reference: lite.phoner.de
- Official reference: illyvoip.com
Reviewed 8 October 2026 against current IllyVoIP source and official documentation. Configuration examples are not evidence of a completed hardware or live integration test. Use the current options and limits available to your account.