
Use n8n’s HTTP Request node to send messages through IllyVoIP. This is a generic REST integration; you do not need an IllyVoIP-specific node. Start with a manually triggered workflow and one recipient before connecting a live business event.
You need permission to edit the n8n workflow, IllyVoIP API access, an allowed sender, balance and an authorized recipient. The instructions use the HTTP Request node’s current generic authentication and JSON controls; labels can vary with your installed n8n version.
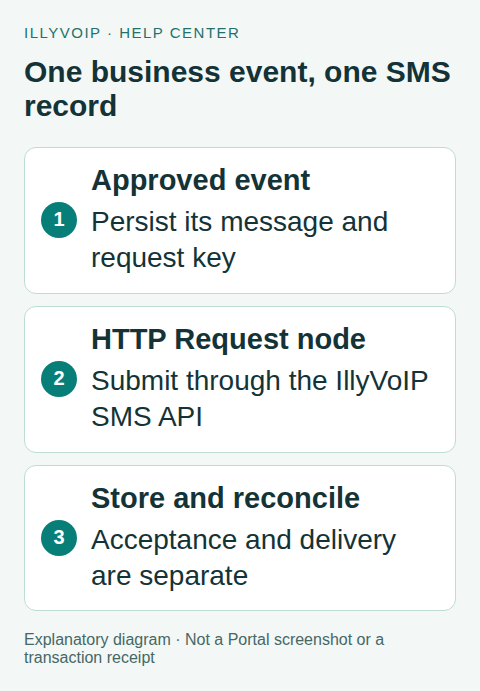
1. Define one durable message record
Create a test item with to, sender, message and request_key. Obtain the values from a reviewed record in your application or data store. The key belongs to the intended business message, not to a particular n8n execution. A new execution ID is therefore a poor retry key.
{
  "to": "REPLACE_WITH_AUTHORIZED_INTERNATIONAL_NUMBER",
  "sender": "REPLACE_WITH_ALLOWED_SENDER",
  "message": "Your requested update is ready.",
  "request_key": "order-EXAMPLE-ready-v1"
}
The placeholders deliberately are not sendable. Replace and review them before execution. Use a unique event reference or saved UUID for each real message, with the documented 8–128-character key format. Persist the original payload with it. In a production workflow, claim the event in durable storage so two executions cannot independently schedule the same message.
2. Store the API key as a credential
Add an HTTP Request node. Choose Generic Credential Type, then Header Auth. Create a credential whose header name is X-Api-Key and whose value is your IllyVoIP API key. Restrict credential and workflow access. Do not place the key in an incoming item, pinned example, exported workflow or screenshot.
3. Configure the send node
- Set Method to POST and URL to
https://api.illyvoip.com/api/v1/sms/messages. - Enable Send Headers. Add
Idempotency-Keywith the expression{{ $json.request_key }}. - Enable Send Body and select JSON. Use fields or an expression that produces a JSON object.
- Map
fromto the item’s sender,toto an array containing its recipient, andmessageto its text. - Leave TLS certificate verification enabled. Turn off automatic Retry On Fail while building the recovery path.
In the JSON body editor’s expression mode, the object is:
{{ { from: $json.sender, to: [$json.to], message: $json.message } }}Do not construct JSON by concatenating quoted recipient text: quotation marks and newlines in a message must remain valid JSON. Inspect the resolved expression before executing. Each incoming item can cause a separate paid request; verify the item count as well as its values.
4. Preserve and classify the response
Under Response options, enable Include Response Headers and Status and choose JSON. With that option, read the response body under body and the HTTP code under statusCode. If you enable Never Error so rejection bodies reach an IF node, explicitly require both HTTP success and body.status === "success"; a green node alone is no longer evidence of acceptance.
Write the event reference, stable key, HTTP result, accepted message IDs and rejected-recipient reasons back to your data store. Preserve the original event reference before the HTTP node replaces the item body. For this one-recipient workflow, confirm one accepted ID before marking the record submitted. Do not mark it delivered.
5. Add delivery tracking
Create a separate HTTP Request node using GET, the same Header Auth credential and URL https://api.illyvoip.com/api/v1/sms/messages/status. Add query parameter message_id using an actual saved queued message ID. Use bounded polling with a delay, or verified webhooks; do not create an unbounded loop that continually runs the workflow.
Record sms_status and available timestamps. Process webhook duplicates idempotently if you later add a receiver. A successful submission, onward sending, delivery and refund are different events.
6. Test recovery before enabling the trigger
With synthetic responses first, verify an accepted recipient, a rejection, an HTTP error and a network timeout. Make sure each retains the same event reference. If a real request times out, mark the record uncertain and investigate; do not generate a new key or automatically rerun the full workflow. A corrected payload is a deliberate new submission only after the earlier outcome is understood.
Finally, execute one authorized real test if you choose to incur the charge. Check both the Portal record and the returned status before activating the live trigger. Set batching/pacing to your account’s actual limits and restrict the trigger to approved business events.
Frequently asked questions
Why do I get duplicate messages?
Check duplicate source events, multiple input items, automatic retries and keys created per execution. The source event and payload must remain stable across recovery.
Why does a successful node contain a rejection?
Never Error changes node error handling. Inspect the HTTP code and API body instead of the node color.
Related guides and official references
- API access and Playground
- Webhook delivery and verification
- IllyVoIP developer resources
- n8n HTTP Request node documentation
Reviewed on 8 October 2026 against the current IllyVoIP implementation and available official documentation. Examples use placeholders and are not evidence of a completed live transaction. Check your account’s current availability and prices before executing paid requests.