
If a Yealink T54W works through its handset but not through a headset, start with the physical connection and audio mode. Changing a working IllyVoIP password or firewall rule is unlikely to fix a headset-only problem.
This guide is for an existing SIP-T54W and a headset you are authorized to use. Check the exact headset model, phone firmware and Yealink compatibility list. A USB, RJ9 or Bluetooth connection does not by itself establish support for every microphone or answer/end feature.
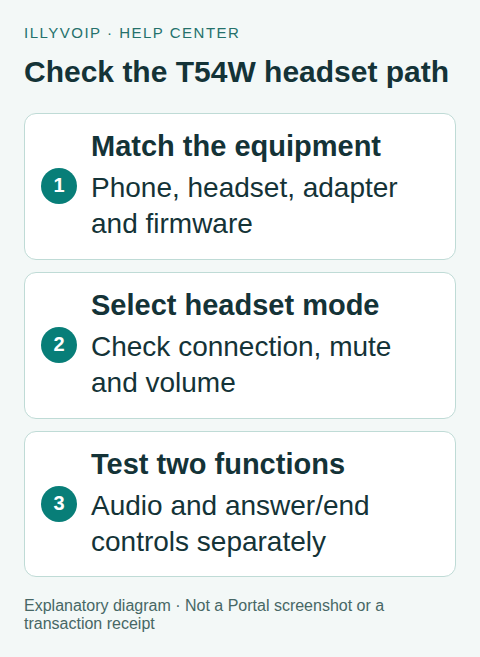
1. Identify the connection you actually have
Record the full phone and headset model names. Distinguish a wired headset, a wireless headset connected through its base, and a Bluetooth headset paired directly with the phone. An adapter or base can be a necessary part of the supported combination.
The T54W provides separate handset/headset connections and supports documented USB/Bluetooth accessories. Use the matching vendor compatibility entry, including firmware minimums and any required EHS adapter. Do not assume that an adapter specified for another Yealink model applies here.
Check who manages the phone before changing configuration. If provisioning controls audio or headset settings, coordinate with that administrator so the change is not overwritten later.
2. Establish a handset baseline
Confirm that the intended IllyVoIP line is registered and that an authorized call works using the normal handset. Note whether both parties can hear, whether the phone rings and whether the call ends correctly. A handset failure requires broader diagnosis before you can isolate the headset.
Use the same line and destination for the headset comparison. Record the call reference and time if needed. Ordinary calls can incur charges, so keep the comparison short and deliberate.
3. Connect the supported headset
- RJ9: connect the approved headset lead to the headset port, not the handset port. Confirm the cable/adapter is the one required for the headset.
- USB: connect the supported headset or wireless base to the phone’s USB port. Check the accessory’s power and any documented adapter requirements.
- Bluetooth: enable Bluetooth using the phone’s matching menu, put the headset in pairing mode, select the intended device and confirm the connection. A pairing to your laptop is not a pairing to the phone.
- EHS wireless base: follow the base and Yealink adapter instructions for this exact combination. Audio cabling and electronic answer/end control can be separate connections.
Do not force a connector into an incompatible socket or substitute a similarly shaped cable without checking its wiring. Keep the handset available during setup.
4. Select headset mode and check local controls
Use the phone’s Headset key to select headset operation and check the corresponding indication. Inspect the physical mute control on the headset, the phone’s mute state and the listening volume. Adjust volume while using the intended audio path rather than assuming a handset volume change applies to the headset.
For Bluetooth or a wireless base, confirm that the headset is connected to the intended device rather than another paired computer or mobile phone. Check battery/power and stay within the supported operating range.
If your firmware offers headset-priority or related options, change them only after checking their behavior in the matching phone guide. Keep one setting change at a time so you know what affected the result.
5. Test audio and call control separately
Place one authorized test call and check what each party hears. Then test answer/end from the phone’s controls and, separately, from the headset’s button if the compatibility entry supports it. Working audio does not prove electronic hook-switch support.
For an incoming call, verify the phone receives the call before investigating a missing headset alert. The purchased number must still route to the correct SIP identity, and DND or forwarding can affect ringing independently of the accessory.
If the headset supports multiple connected devices, test the actual daily arrangement. Switching focus between a computer and phone can change which device receives the microphone or button action.
6. Isolate the symptom
You hear the caller but they cannot hear you: check physical and phone mute, the selected path, cable compatibility and microphone position. Compare the handset immediately.
No sound in the headset: confirm headset mode, output volume, connection/pairing and base power. Do not change the SIP server while the handset call works.
Answer/end button fails but audio works: inspect the exact EHS/USB compatibility, required adapter and firmware. This is not automatically a network fault.
Echo or distortion: compare a lower listening level and the handset path, then follow the echo guide. Avoid random gain/impedance changes without the accessory’s documentation.
Keep a useful support record
Record phone firmware, headset/base/adapter models, connection type, the handset-versus-headset result and the action that fails. Include a public call reference only when relevant. Do not send SIP credentials or a complete configuration export as routine evidence.
Restore unsuccessful setting changes. If a firmware update is indicated by the compatibility matrix, plan it using the separate upgrade guide and its version restrictions rather than updating during an active call.
Frequently asked questions
Does any USB headset work fully? No. Check audio and call-control compatibility for the exact combination.
Do I need another IllyVoIP account for a headset? A headset is an audio accessory for the existing phone; it does not create a separate SIP identity.
Related guides and references
- Set up a Yealink desk phone with IllyVoIP
- Fix One-Way or Missing Audio on SIP Phones and PBXs
- Official reference: support.yealink.com
- Official reference: support.yealink.com
Reviewed 9 October 2026 using current IllyVoIP implementation and official references. Check your installed version and account options before applying settings. Examples do not certify a physical device or completed live integration.