
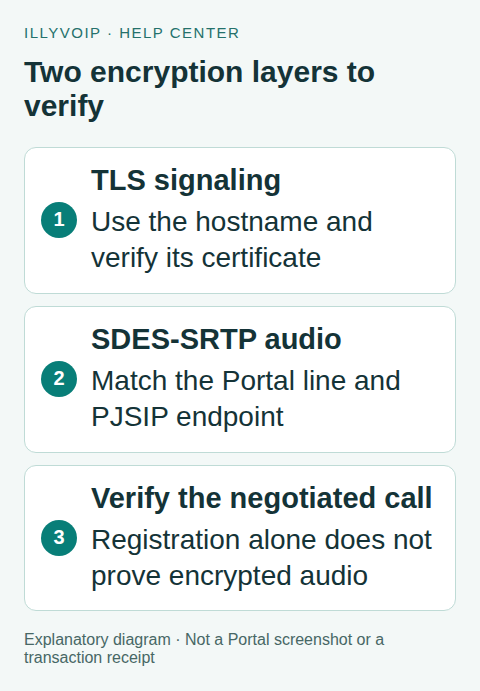
For an Asterisk PJSIP trunk, configure TLS for SIP signaling and SDES-SRTP for the call audio, with the same media mode selected on the IllyVoIP SIP line. These are separate controls: TLS alone does not encrypt the RTP audio stream.
This guide is for administrators of a directly managed Asterisk system using res_pjsip, with an already working IllyVoIP password-authenticated trunk. Confirm each option against your installed Asterisk release. If FreePBX or another management interface generates the files, use that interface and its supported settings rather than pasting changes into generated configuration.
1. Prepare a reversible change
Back up the current PJSIP transport, registration, AOR and endpoint configuration privately. Record the existing Portal line’s audio mode. Choose a maintenance window and a test extension; transport changes can need a restart and interrupt active calls. Keep the established inbound dialplan, caller-ID permissions, authentication and destination restrictions.
Check that your Asterisk build has TLS support and the SRTP resource module available. At the CLI, inspect module show like res_srtp and the installed PJSIP configuration help. A missing module is not a reason to silently allow unencrypted media while reporting the migration complete.
2. Get the current IllyVoIP endpoint values
In SIP Lines, open Technical endpoints. Copy the SIP hostname and TLS destination port for your connection. Use the hostname for TLS rather than replacing it with a resolved IP address. Obtain credentials from the actual SIP line, not your Portal login.
In that line’s audio-encryption settings, select SDES-SRTP as part of the coordinated change. This affects other devices using the same identity: identify them first, or use an appropriate separate test line. Do not select DTLS-SRTP merely because its name also contains SRTP.
3. Configure a verified TLS transport
Adapt this transport fragment in your existing PJSIP configuration. Every uppercase value is a placeholder, not literal configuration. Choose a free local bind address/port and a readable trusted CA bundle appropriate to your host; the local bind port is not necessarily the remote IllyVoIP port.
[illy-tls]
type=transport
protocol=tls
bind=LOCAL_BIND_ADDRESS:LOCAL_TLS_PORT
ca_list_file=/ABSOLUTE/PATH/TO/TRUSTED_CA_BUNDLE.pem
verify_server=yes
method=tlsv1_2
Use a TLS method supported by your installed Asterisk/PJPROJECT build and the current service. The TLS 1.2 example is explicit; do not copy obsolete SSL methods from an old tutorial. If your deployment accepts inbound TLS connections or requires a local certificate, configure the valid certificate and matching private key using your own hostname and certificate-management procedure. Do not borrow a provider’s certificate or disable server verification to bypass a failure.
Certificate verification requires a trusted chain, valid time and a matching remote hostname. Inspect the actual certificate and your Asterisk version’s hostname/wildcard behavior if verification fails. Fix the name, trust store or certificate issue instead of setting verify_server=no.
4. Point registration and outgoing requests at TLS
In the existing registration object, set transport=illy-tls. Update its server URI and client URI using the current SIP hostname, remote TLS port and your SIP username. A URI shape is:
server_uri=sip:SIP_HOSTNAME:REMOTE_TLS_PORT\;transport=tls
client_uri=sip:SIP_USERNAME@SIP_HOSTNAME:REMOTE_TLS_PORT\;transport=tls
Set the existing endpoint’s transport to illy-tls too. If the trunk uses a static AOR contact for outbound calls, update that contact to the corresponding TLS SIP URI. Keep the registration and endpoint linked to the correct existing authentication object. A TLS registration alone does not force an unrelated outbound endpoint or AOR to use that transport.
These fragments extend the object relationships in the existing Asterisk trunk guide; they are not a complete replacement configuration. Preserve your working NAT, source identification and restricted incoming context. Check that custom templates do not override the changed transport.
5. Require matching encrypted media
In the IllyVoIP endpoint object, configure:
media_encryption=sdes
media_encryption_optimistic=no
The first option matches the Portal’s SDES-SRTP choice. The second prevents an optimistic fallback from being mistaken for required encryption. SDES negotiates media keys in signaling, which is why verified TLS is part of this same setup. A browser’s DTLS configuration is not interchangeable with this PJSIP SDES example.
6. Apply and verify both layers
- Use your release’s supported configuration-loading procedure in the maintenance window. A normal reload may not replace an existing transport.
- Inspect
pjsip show transports,pjsip show registrationsand the specific endpoint/AOR. Confirm the intended objects are loaded. - Review a short private TLS/SIP diagnostic for the chosen test call. Confirm TLS negotiation and certificate validation; registration success alone does not prove media encryption.
- Inspect the negotiated media profile and SRTP behavior, then test two-way audio and keypad tones.
- For an active incoming number routed to the line, place an authorized incoming test and check its transport, media and receiving extension separately.
Tests can incur calling charges. Keep traces private: SDES signaling can contain media key material as well as identifiers. Disable diagnostic logging after collecting the needed evidence. A lock icon or a selected UI option is not a substitute for negotiated-call checks.
Troubleshooting and rollback
TLS connection failure: check hostname, destination port, reachability, system clock, CA trust and TLS compatibility. Registration failure after TLS connects: check the SIP identity and authentication mappings. Answered call with no audio: compare both media modes and negotiated SDP before changing codecs or firewall rules.
If the change fails, restore the saved PBX configuration and matching Portal media setting together using your maintenance procedure. Do not leave one side on SDES and the other on plain RTP, or label the rollback as an encrypted configuration.
Frequently asked questions
Is the entire call encrypted all the way through the telephone network?
This configuration protects the applicable SIP/media connection between your PBX and IllyVoIP. It does not establish end-to-end encryption across every downstream carrier or PSTN leg.
Can I apply the same files directly to FreePBX?
No. Use the management interface that owns those files and confirm its matching settings. The underlying concepts are useful, but generated configuration must remain under that interface’s control.
Related guides and official references
- API access and Playground
- Webhook delivery and verification
- IllyVoIP developer resources
- Existing Asterisk PJSIP trunk setup
- Asterisk PJSIP option reference
- Asterisk configuration examples
Reviewed on 8 October 2026 against the current IllyVoIP implementation and available official documentation. Examples use placeholders and are not evidence of a completed live transaction. Check your account’s current availability and prices before executing paid requests.