
This walkthrough connects ordinary analog telephones to IllyVoIP through a Grandstream HT812, HT814 or HT818. It covers the original HT812/HT814 interface described in Grandstream's administration guide, not the separate V2 interface. Read the exact model and hardware revision from the device before using the menus below.
The HT812 has two telephone ports and the HT814 has four. Their configuration separates SIP profiles, which hold connection settings, from FXS ports, which identify the attached telephones and their SIP accounts. Configuring a profile alone does not configure every phone port.
HT818: use the same profile-to-port workflow for eight phones
The original HT818 extends this workflow to eight FXS telephone ports. Identify the hardware revision first: HT818 V2 is a separate model with its own documentation. The steps below use the original HT818 administration guide, alongside the existing original HT812/HT814 instructions.
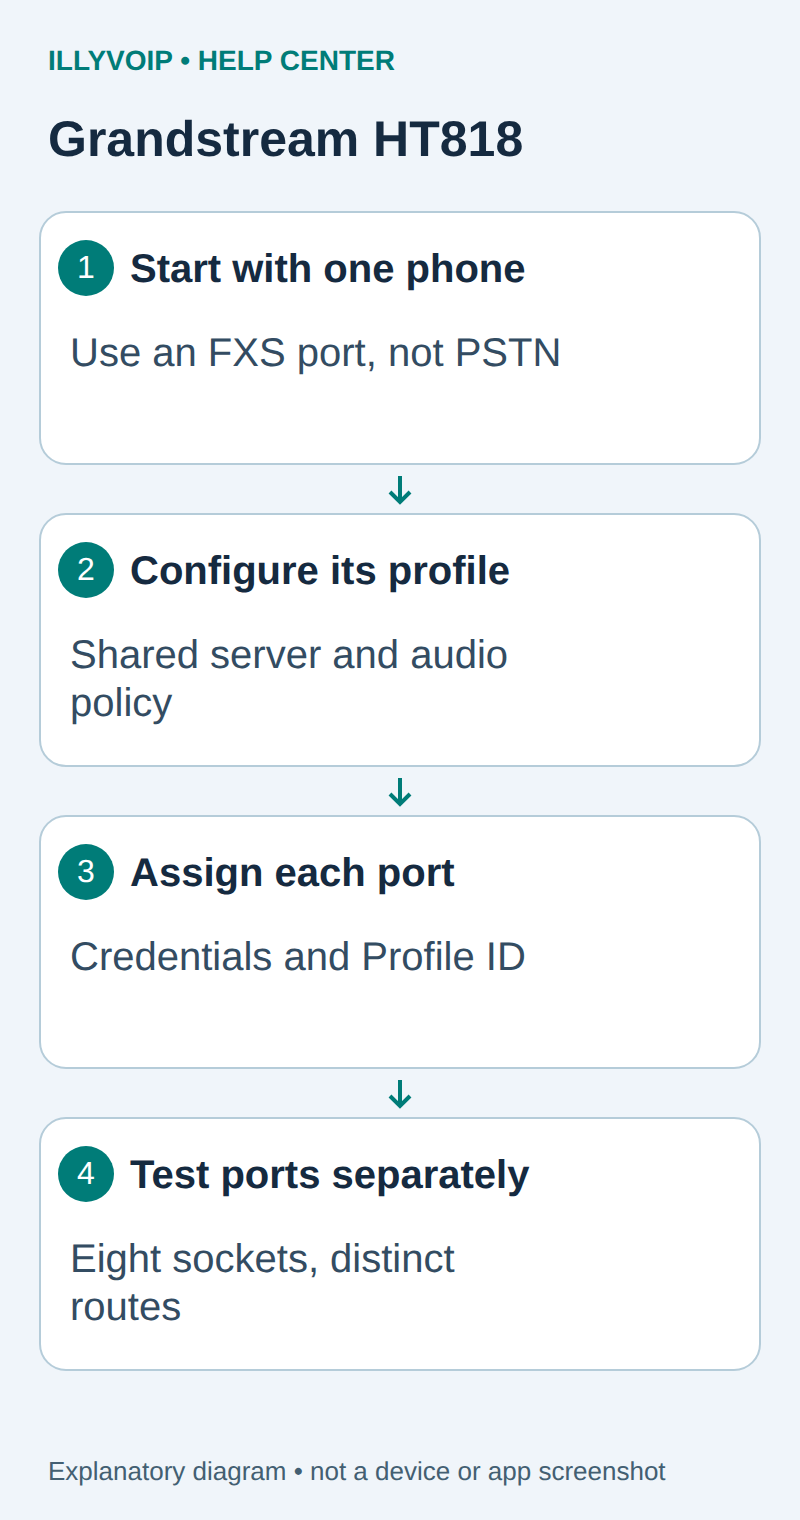
- Connect one ordinary analog telephone to the intended FXS port and connect the adapter's WAN side to the trusted LAN behind your router.
- Obtain the real management address. If WAN web access is disabled, use the documented isolated LAN management arrangement rather than exposing the adapter publicly.
- Configure an available Profile for the IllyVoIP endpoint, transport, registration and media settings.
- Under FXS Ports, locate the physical port's row. Enter SIP User ID, Authenticate ID and Password for that phone, then choose the intended Profile ID.
- Keep Hunting Group at None for independent phones. Save/apply and inspect the exact port under the status page.
- Repeat for ports 2–8 only after the first phone has passed outgoing and incoming tests.
Keep a private mapping of port number, location, SIP identity and incoming destination. This is especially useful on an eight-port adapter: changing one shared profile may affect several phones, while a wrong password in one row usually affects that port alone.
Do not connect an FXS socket to a live PSTN wall circuit. More sockets do not establish more simultaneous-call allowance, an FXO bridge or fax compatibility. Test each phone's dialed digits, caller ID, ringing and speech independently. If only one phone rings incorrectly, inspect its identity, Profile ID and hunting/routing settings before changing the whole profile.
Reference: Grandstream HT818 administration guide. Expansion reviewed October 11, 2026; no physical eight-port acceptance is claimed.
1. Connect one telephone first
- Connect a normal analog telephone to PHONE 1 using a suitable telephone cable.
- For an adapter behind your existing router, connect the adapter's WAN Ethernet port to the trusted network.
- Use the power supply specified for your model. Wait for the adapter to start.
- Record the existing network mode and configuration before changing a previously used adapter.
Do not connect the telephone port to an active telephone-company wall line: an FXS port supplies the telephone connection rather than accepting another powered phone service. Start with one ordinary voice handset. Fax machines, alarm systems and emergency equipment need their own compatibility and service checks.
The adapter also has a LAN port and router functions. Do not connect its LAN side to the office network indiscriminately or enable another DHCP server there. You can use it behind an existing router without redesigning the office network.
2. Reach the administration interface
From the connected telephone, dial ***, wait for the menu prompt and enter 02 to hear the WAN IP address. You can also identify the device in the router's DHCP list.
Web access from the adapter's WAN side may be disabled. For isolated local setup, connect your configuration computer to the adapter's LAN port and use its LAN management address. The documented factory address is 192.168.2.1, but a configured device or subnet conflict can change it. Read the actual computer gateway/device configuration rather than assuming that address always applies.
Sign in with administrator credentials managed for this unit. If you need WAN-side management inside your trusted network, have the administrator deliberately configure that access; do not enable public remote administration. The vendor manual documents IVR option 12 for WAN web-access control, but toggling it is not necessary merely because SIP registration fails.
3. Collect a line for each independently routed telephone
- In IllyVoIP, open Services → SIP Lines.
- Select the identity for the first telephone and confirm password authentication.
- Obtain its SIP username and SIP password. Expand Technical endpoints for the regional server and transport details.
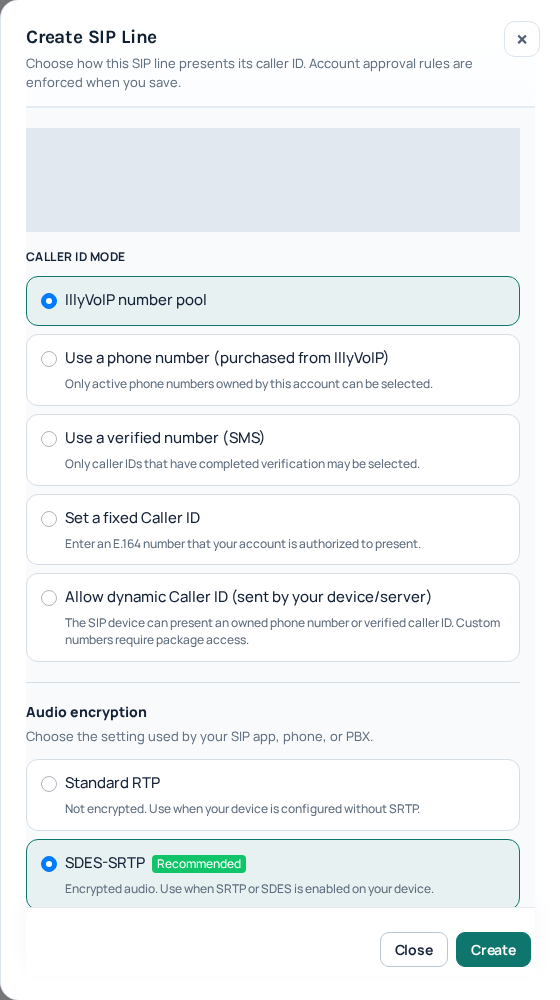
- Record its audio mode and approved caller ID.
- For another telephone that needs independent incoming routing, plan a separate appropriate SIP identity instead of copying the first identity automatically.
Use the SIP line guide if another line is needed, reviewing the displayed terms before creating it. The adapter administrator password, Portal login password and SIP password serve different purposes.
4. Configure the SIP profile
Open the chosen Profile settings page. Start with one profile, such as Profile 1, and record which ports will use it.
| Profile setting | What to use |
|---|---|
| Primary SIP Server | The current IllyVoIP regional hostname and destination-port format required for your connection. |
| SIP Transport | The matching supported UDP, TCP or TLS setting from your connection details. |
| SIP Registration | Enable registration for the password-authenticated lines in this walkthrough. |
| Failover SIP Server / Outbound Proxy | Configure only when specifically supplied for your arrangement; do not copy unrelated provider examples. |
| SRTP Mode | Match the SIP line's audio mode and the adapter's supported SRTP configuration. |
| Preferred codecs / DTMF method | Use mutually supported codecs and the agreed telephone-event method. Test keypad input separately from speech. |
A profile can affect several ports. Before changing its transport or audio settings later, identify every telephone using it. TLS signaling and SRTP audio are separate choices; standard RTP is unencrypted. Do not select an incompatible media mode simply to match a screenshot.
5. Assign credentials to the physical FXS port
Open FXS Ports and locate the row corresponding to PHONE 1. Map the fields to the first IllyVoIP identity:
| Port field | Value |
|---|---|
| SIP User ID | The selected line's SIP username. |
| Authenticate ID | The authentication identity supplied for that line, normally its SIP username. |
| Password | The line's SIP password. |
| Name | An optional label for the telephone. |
| Profile ID | The profile configured in the previous step. |
| Enable Port | Enable the intended port where this control is present. |
| Hunting Group | Use None for independent ports in this initial setup. Do not join a hunting group accidentally. |
Save with the page's Update or Apply control. Follow a restart prompt only when no affected phone is carrying a call. In Status → Port Status, check registration for the exact port you configured.
A dial tone is not proof of a successful SIP registration. Conversely, a blank-looking saved password field may be masking the value; avoid replacing credentials repeatedly when the port is already registered.
6. Add another telephone without mixing identities
For PHONE 2, and PHONE 3 or 4 on an HT814, repeat the port assignment with the identity intended for that telephone. Ports can share a compatible provider profile while using their own credentials. Record a simple mapping: physical port, telephone location, SIP identity and incoming number.
Hunting groups intentionally share call handling and are a different arrangement. They should not be used as an unexplained shortcut to make all phones ring. If that is your requirement, design the group and incoming routing first, then verify which ports ring and which identity is used on an outgoing call.
The number of sockets is not a guarantee of additional simultaneous-call allowance. Account limits and the complete call arrangement still apply.
7. Check dialing and incoming routing
- From PHONE 1, dial a controlled destination in the intended international format. Check your balance and the rate first; the call may be charged.
- Confirm that the adapter sends the expected number rather than waiting for more digits. Its dial plan controls digit collection and transformation.
- Check speech in both directions and the caller ID received at the destination.
- Route an active IllyVoIP number to the SIP identity configured for PHONE 1, then call it from another device.
- Repeat the test for each additional port. Verify that a call to one identity does not unexpectedly ring another telephone.
Do not replace the entire dial plan with a permissive internet example to fix one number. Check the exact pattern and timeout involved. Use incoming-number routing and caller-ID settings for the Portal parts of the setup.
8. Diagnose the affected port
- No dial tone: check power, the telephone cable, handset and physical FXS port before changing SIP credentials.
- Only one port fails registration: compare its credentials, enable state and Profile ID with the intended mapping.
- Every port on one profile fails: inspect that profile's server, registration, transport and network configuration.
- Registered but calls fail: inspect digit collection, account balance, permitted destinations and caller-ID policy.
- Incoming call reaches the wrong handset: compare the Portal destination, port identity, hunting-group and any Routing ID settings.
- Speech works but menu digits do not: test the DTMF method; do not treat it as a failed SIP login.
- One-way audio: check the network/media path and matching audio encryption.
When contacting Support, include the exact model/revision, firmware, affected port, time/timezone and public call reference. Hide passwords in any screenshot and keep exported adapter configurations private.
Frequently asked questions
Can I follow this on an HT812 V2?
Not by assuming the menus are identical. Identify the V2 hardware and use its matching manual. This article's profile/port path is scoped to the original HT812/HT814 documentation.
Do I need to use the adapter as my router?
No. The setup above places its WAN connection behind your existing router. Changing network mode can affect access and connected devices, so treat it as a separate administrator decision.
Does a successful phone call prove fax will work?
No. Fax settings, codecs, service support and the complete route need a separate compatibility test.
Official documentation and scope
Grandstream HT812/HT814 administration guide and interface illustrations.
Reviewed October 8, 2026. Based on the documented original-hardware workflow and IllyVoIP settings, not a physical-adapter or live-call test. The Portal capture is genuine and is not an adapter-interface image.