
This guide follows the VitalPBX 4/4.5 PJSIP workflow and the official documentation reviewed on 7 October 2026. Menu labels can vary between releases. It covers an existing PBX using IllyVoIP password authentication; installation, IP-auth migration and emergency calling need separate planning.
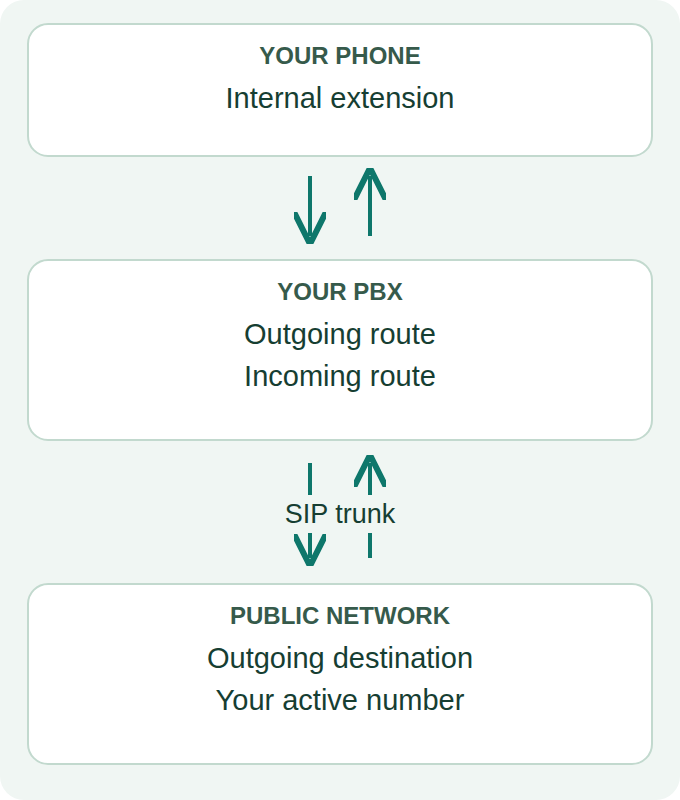
A registered trunk is only the connection between your PBX and IllyVoIP. To make it useful, you also need an outgoing route that your extensions may use and an incoming route for your business number. Work through those three stages separately so a routing problem does not send you back to changing a correct password.
Before you start
Have administrator access to the PBX, a private backup, a working internal extension and permission to use the IllyVoIP account. Keep the current office route available while preparing the new one. Review your balance, destination rates and line or package limits before a real test: a test call may be charged. You do not need to buy a number just to register a trunk; receiving public calls requires an active number routed to it.
1. Collect the IllyVoIP connection details
Open SIP Lines in the Portal and select the intended line. Obtain its SIP username, SIP password, server hostname, destination port and transport. These are connection credentials, not your Portal email and password. If the line uses IP authentication, stop here and follow that connection's instructions; enabling registration or changing its mode can interrupt devices already using it.
Use the connection values supplied for your account. Do not copy a server address, password, port or provider-specific header from somebody else's tutorial. Keep the credentials in a private password manager, and keep them out of screenshots and support posts.
2. Create the PJSIP trunk in VitalPBX
In VitalPBX, open PBX → Calls Routing → Trunks. Choose PJSIP and give the connection a recognizable Description, such as IllyVoIP. Keep it enabled. Use the General section for the remote connection and Outbound Registration Settings for registration. PJSIP is the Asterisk channel driver used here; IllyVoIP still uses the SIP protocol.
| VitalPBX field | What to enter or check |
|---|---|
| Description | A local label, such as IllyVoIP; this is not an authentication username. |
| Remote Host / Remote Port | The SIP server and destination port supplied for your IllyVoIP connection. |
| Remote Username / Remote Secret | The line's SIP username and SIP password. |
| Require Registration | Enable for the password-registration workflow in this guide. |
| Transport | Match the supplied SIP transport. For TLS, use the hostname and valid certificate verification. |
| Local Username / Local Secret | Local-side identity or authentication fields; do not confuse them with the remote credentials. |
| Contacts / Match / From Domain | Connection-specific advanced fields. Use verified requirements, not guessed IPs, broad match ranges or values copied from another provider. |
Leave unrelated advanced options unchanged. If your connection requires additional identity or incoming-source settings, confirm them with IllyVoIP Support before filling them in. Save and Apply Changes after reviewing the entries. A trunk name, authentication username and outgoing caller ID serve different purposes and should not be substituted for one another.
3. Check registration before configuring calls
Check Reports → PBX Reports → PJSIP Endpoints → Trunks. Distinguish an endpoint responding to a reachability check from a successful outbound registration. Administrators with authorized CLI access can also inspect pjsip show registrations; this is a read-only diagnostic, not an instruction to edit generated Asterisk files. Extension registration and trunk registration are separate checks.
A challenge followed by successful authentication can be normal. Repeated authentication failures, a rejected registration or a timeout need investigation. Check username, password, line authentication mode, DNS, destination port and transport first. Avoid rapid retries and repeated password resets. Do not broaden firewall access to diagnose a mistyped credential.
4. Build a controlled outgoing route
Open PBX → Calls Routing → Outbound Routes. Add a clear description and select the IllyVoIP trunk. Start with a narrow pattern for a destination you control, and permit only the intended test extension through the relevant Class of Service and routing permissions. Review route priority and trunk order so a different provider does not handle the test unnoticed.
Pattern matches the dialed digits. Prefix removes an office access prefix, while Prepend adds digits before the number is sent. For example, if staff dial an extra 9 for an outside line, remove that access digit once; it is not part of the destination's country code. Do not add the country code again when the user already dialed it. Inspect the final number sent to IllyVoIP, and use the international format required by your connection. Avoid an unrestricted catch-all during setup.
5. Route an incoming IllyVoIP number
First, in IllyVoIP, direct the active phone number to the SIP line used by this PBX. Then open PBX → Calls Routing → Inbound Routes in VitalPBX. Use Default routing, identify the route and enter the expected called number in DID Pattern. Choose a known working extension as Inbound Destination. Leave CID Pattern empty unless you intentionally want to restrict which callers match this route.
DID is the number being called; CID identifies the caller. Match the DID format actually received, including whether a plus sign or another identifier is present. If it differs from your expectation, inspect the incoming call information before changing header extraction or adding a catch-all. Leaving both patterns empty makes an Any/Any route. Once one extension rings correctly, add the intended ring group, queue, IVR or schedule. Never send unmatched public traffic into unrestricted external dialing.
6. Match caller ID, audio and network settings
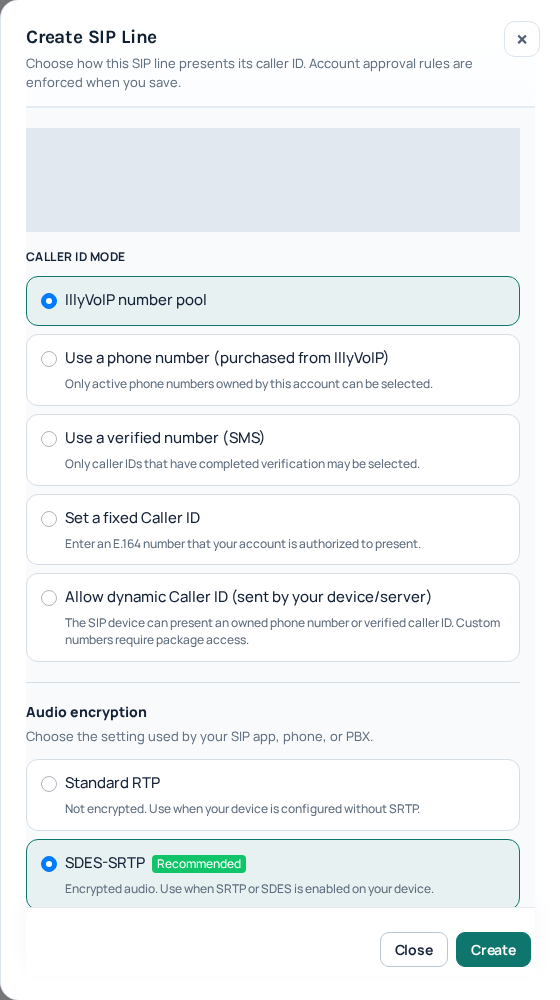
Choose an outgoing caller ID allowed by the IllyVoIP line and package. VitalPBX may override it at extension, route or trunk level; avoid competing overrides during setup. Entering a number in Trunk CID does not verify ownership or grant permission to present it. A successful registration also does not guarantee sufficient balance, destination access or available call capacity.
Match the PBX's media mode to the SIP line: Standard RTP is unencrypted; SDES-SRTP and DTLS-SRTP are different encrypted modes. TLS protects SIP signaling and does not automatically enable encrypted audio. Choose a mutually supported codec and DTMF method. Do not select a browser-oriented setting simply because the IllyVoIP Webphone uses it.
For a PBX behind NAT, review its external address, local networks and actual RTP configuration against the installed VitalPBX version. One-way audio often requires checking the media path separately from registration. Keep the firewall enabled and use only the necessary, verified source and port rules. If the public IP or router changes, revisit NAT and any IP restrictions instead of altering credentials at random.
Troubleshoot the stage that is failing
| What you observe | Where to look first |
|---|---|
| The trunk does not register | Remote credentials, authentication mode, hostname resolution, port, transport and the exact response. |
| Registered, but no outgoing call leaves the PBX | Dial pattern, extension permissions, route priority and selected trunk. |
| IllyVoIP rejects an outgoing call | Final destination format, permitted caller ID, balance, package access, capacity and the recorded SIP response. |
| The number rings nowhere | Number-to-line assignment in IllyVoIP, received DID, inbound destination, schedule and extension status. |
| The call connects with one-way or no audio | RTP reachability, NAT, negotiated codec and the line/PBX media-encryption match. |
| Telephone menu digits do not work | The negotiated DTMF method across the phone, PBX and trunk; test against a menu you control. |
Checks before your team starts using the trunk
Confirm registration, then make an authorized outgoing call and an incoming call to your own number. Check the actual trunk used, two-way audio, displayed caller ID, keypad digits and clean hang-up. Confirm that an extension without permission cannot use the new outgoing route. Only then widen access to the intended users and destinations.
If a check fails, change one setting at a time and keep the previous value. Give Support the PBX version, time and timezone, affected call direction, sanitized error and public call reference from the Portal if available. Never publish SIP passwords or raw account logs. These instructions were checked against documentation and Portal behavior; they do not claim a live VitalPBX calling certification. Emergency calling, fax and other specialist use need separate verification.