
If speech breaks into fragments, arrives unevenly or becomes robotic during an IllyVoIP call, compare the affected call with a working one before changing settings. Jitter and lost packets can explain these symptoms, but a poor headset, overloaded computer or one remote destination can sound similar.
This guide is for a person troubleshooting their own phone, softphone or PBX. Basic comparisons need no packet capture. RTP analysis is an optional step for an administrator who can collect traffic lawfully on the affected network. Keep the separate one-way-audio guide for a call where a direction is completely silent.
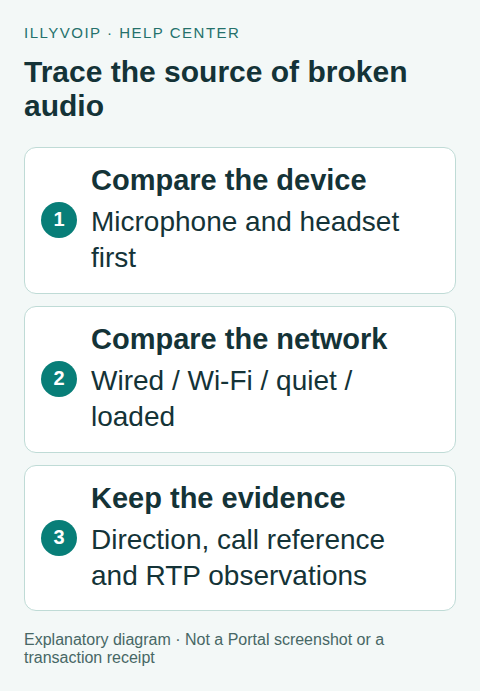
1. Write down a reproducible example
Record the call time and timezone, direction, device, connection type and public Call Reports reference. Ask which person heard the problem. Audio leaving your microphone takes a different path from audio arriving at your speaker; “bad audio” does not identify the affected direction.
Note whether it began immediately, during another download, after moving away from a Wi-Fi access point, or only after several minutes. Compare the same two endpoints where possible. Use a number you control or a participant who agreed to the test; ordinary calling charges can apply.
2. Rule out the local audio path
- Check the selected microphone and speaker rather than relying on the operating system default.
- Compare a wired headset or handset with Bluetooth or speakerphone.
- Close unnecessary CPU-intensive applications and inspect whether the computer is overloaded.
- Use a local microphone recording to check for distortion, clipping or intermittent capture.
If the local recording is already broken, correct that first. If it is clear, you have checked microphone capture, not the whole call path. Keep the result with your call example.
3. Compare the connection under controlled conditions
Make a small comparison set, changing one factor at a time:
- Use wired Ethernet instead of Wi-Fi on the same connection, if available.
- Compare a quiet network with the period when the problem usually occurs. Pause your own large upload or backup rather than interrupting other users without permission.
- Try a second trusted network using the same authorized device.
- Compare a second destination you control. A problem limited to one destination needs a working counterexample.
Document the observed result, not just the connection speed. High advertised bandwidth does not prevent short congestion bursts. Upload saturation can affect outgoing speech even when downloads look fast. A speed test itself creates load, so record whether it was running during the call.
The Portal’s Connection quality test checks browser reachability and response times. It does not measure call jitter, RTP loss, bandwidth or microphone audio. A green result does not rule out this problem, and a browser on another network is not testing the PBX’s path.
4. Read media evidence when available
For an authorized RTP capture, Wireshark’s Telephony → RTP → RTP Streams and stream-analysis tools show observations such as packet sequence gaps and arrival variation. Inspect the stream in the direction that sounded bad, then the reverse stream. Record the capture point: traffic seen at the PBX does not necessarily show what reached the remote handset.
Jitter describes variation in packet arrival timing. Loss inferred from sequence numbers describes gaps in the observed stream. A capture tool that dropped packets, a capture begun mid-call, or traffic missing from the chosen interface can distort the result. Inspect capture health and coverage before treating every gap as network loss.
Encryption and the negotiated media format limit what can be inspected. Do not turn off TLS or SRTP merely to make a trace readable. Use available endpoint statistics or ask Support which evidence is appropriate. Never publish a capture containing private signaling, phone numbers or recoverable audio.
5. Choose a correction supported by the comparison
If Ethernet fixes a Wi-Fi-only issue, investigate coverage, interference and access-point load. If the issue follows a saturated uplink, work with the network administrator on capacity and traffic management. If it follows one headset, replace or reconfigure that device. If it affects one destination across different networks, retain both failing and working examples for Support.
A larger jitter buffer can trade delay for tolerance of arrival variation; it does not repair packets that never arrive. Avoid changing every phone’s buffer, codec and router settings together. Keep the original settings, apply one justified change and repeat the same comparison. There is no single loss or jitter number that guarantees intelligible audio across every device and codec.
6. Send a useful support report
Include the public call reference, time/timezone, direction of the bad audio, endpoint model/software, wired or Wi-Fi result and the smallest relevant sanitized diagnostic. Say whether one or several destinations are affected. Explain what changed during each comparison and whether the result was repeatable. Do not include SIP passwords, API keys or unrelated calls.
Frequently asked questions
Will changing my routing package fix choppy speech?
Not necessarily. First identify whether the impairment follows your device/network or a specific destination. A package change is not a substitute for evidence.
Does a recording prove what both people heard?
A recording reflects the audio available where it was made. It may not reveal a speaker/headset problem or every impairment on the final receiving leg.
Related guides and references
- Test your connection
- Fix one way voip audio
- Official reference: www.wireshark.org
- Official reference: illyvoip.com
Reviewed 8 October 2026 against current IllyVoIP source and official documentation. Configuration examples are not evidence of a completed hardware or live integration test. Use the current options and limits available to your account.
Configure and measure VoIP QoS on the network you control
Quality of Service, or QoS, can help when voice packets wait behind other traffic at a congested link. It will not repair a failed microphone, incompatible codec or packet loss occurring somewhere you cannot control. Use the measurements above to identify a likely bottleneck before changing network policy.
This workflow is for the administrator of the LAN/router carrying an IllyVoIP phone or PBX connection. Router names and commands vary by model and firmware, so apply it through that device's documented QoS facilities. Keep a configuration backup and record the existing policy.
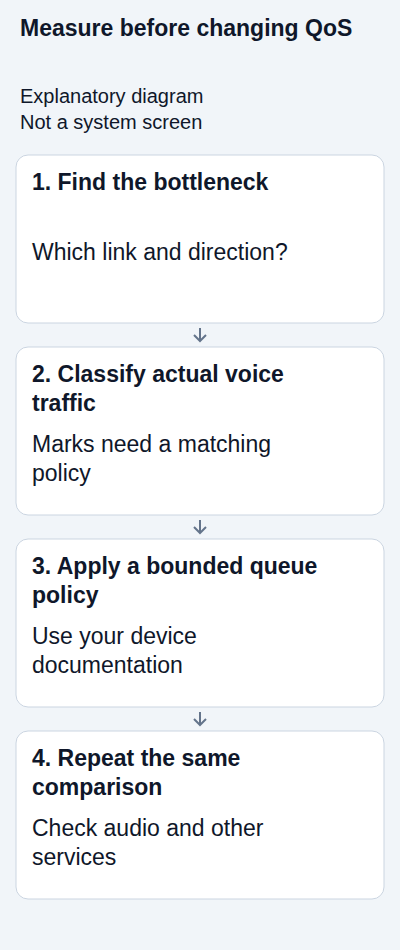
1. Establish a useful baseline
Choose the same two authorized endpoints for each comparison. Record whether the affected audio is sent or received, the connection type, test time, concurrent network use and any available per-stream packet-loss/jitter measurements. Make a short quiet-network call first, then compare the symptom during the normal activity that causes it.
Do not saturate a live office link with a stress test or start a burst of chargeable calls. If a controlled load test is necessary, schedule it with the network owner and agree limits. A speed-test result from an idle laptop alone does not describe the phone's path during a busy call.
2. Find the constrained link and direction
Inspect interface utilization, queue drops and the actual service rate. A router may have a gigabit Ethernet interface while the Internet service beyond it has a much lower upload rate. If the queue builds inside the ISP's equipment, a priority setting on a different idle interface may have little effect.
Upload congestion can damage the audio you send even while downloads look healthy. Download congestion may form upstream of your router; local marking cannot guarantee priority there. Wi-Fi interference and airtime contention also need wireless-specific investigation rather than an assumption that wired-router QoS will solve them.
3. Identify voice traffic without trusting everything
Use verified device, network and protocol information from the actual deployment. SIP signaling and RTP/SRTP media are different traffic flows and can use different addresses. Do not classify all traffic to a remembered SIP hostname as audio or copy a universal RTP range from another PBX.
A DSCP mark labels traffic; it does not, by itself, create bandwidth or a priority queue. The devices at the bottleneck must recognize the classification and apply the intended scheduling policy. Define which trusted phones or PBX interfaces may supply marks; an arbitrary workstation should not gain priority simply by marking every packet as voice.
4. Apply a bounded policy using your router's documentation
Follow the vendor's supported method to classify the required traffic and configure the appropriate queue at the identified egress point. Where shaping is needed to move the bottleneck into a queue you control, size it from measured usable service capacity and the vendor's guidance, not just the nominal Ethernet link speed.
Plan capacity for the actual codec, packetization and network overhead across expected simultaneous calls. Raw codec bitrate is not the full bandwidth requirement. A priority queue should have a deliberate capacity policy; giving unlimited strict priority to a broad traffic class can harm other essential services.
Change one relevant policy at a time. Do not remove existing traffic protections or copy an old Cisco configuration into a different manufacturer's router. Keep the original configuration available and make changes in the agreed maintenance window.
5. Verify classification and compare the calls
During one authorized call, inspect the intended queue's counters. They should show that the actual voice traffic enters that class. A configured rule whose counter never changes may match the wrong addresses, direction or interface. Conversely, a counter including every large file transfer suggests the class is too broad.
Repeat the original comparison under comparable normal network use. Record the audible result and available loss/jitter/queue-drop measurements in the same direction. Check that other required services still work. Keep the change only when the evidence supports it; restore the previous policy if the result worsens or the change affects unrelated work.
What a successful QoS test proves
An improvement under the measured conditions shows that the policy helped that scenario. It does not reserve priority across the public Internet or guarantee quality at every load. If loss remains beyond your network, provide the access provider or IllyVoIP Support with the time, path evidence and call reference instead of increasing local priority repeatedly.
Should every device use the same DSCP value? Use the network's documented classification policy. The value only helps if the relevant devices trust and act on it appropriately.
Can QoS replace more capacity? It changes how constrained capacity is shared. If legitimate simultaneous calls exceed the available capacity, prioritization cannot create the missing bandwidth.
Related guides and references
- Fix One-Way or Missing Audio on SIP Phones and PBXs
- Test your connection to IllyVoIP
- Capture a SIP call trace for IllyVoIP Support with Wireshark
- Cisco: investigating QoS and choppy voice
- Cisco: voice QoS concepts and scheduling
Reviewed 10 October 2026 against current IllyVoIP guidance and the official references above. Version-specific commands and menus need to match your installation. This guide does not claim a completed call test on your PBX or network.