
Connect your 3CX PBX to IllyVoIP for outbound calling and incoming DID calls. This walkthrough covers the SIP trunk, outbound rule and incoming-number routing. Menu names and generic-trunk availability depend on your 3CX version and edition.
Step 1: Prepare your IllyVoIP account
Sign in and open Services → SIP Lines. Select the identity intended for your PBX. Note its authentication mode, SIP username, regional server, transport and call-audio setting. Keep the SIP password private and do not use the Portal login password.
Check your selected routing package, allowed Caller ID and available balance. For incoming calls you also need an active phone number and a saved route to your PBX.
Step 2: Open the 3CX administrator interface
Use your own 3CX administrator account. In versions with the Voice & Chat menu, open it and choose the option to add a SIP trunk. Other versions label this section SIP Trunks. Use a generic configuration when supported by your installation; do not select an unrelated carrier template simply because it appears in an old screenshot.
Step 3: Configure the SIP trunk
- Name: choose a descriptive name such as IllyVoIP.
- Registrar/server: copy the server shown for your selected IllyVoIP line and region.
- Authentication ID: use your SIP username for password authentication.
- Authentication password: use that line's SIP password, not your 3CX or Portal password.
- IP authentication: if using this mode, first configure the PBX's public source IP on the intended IllyVoIP SIP line. Do not mix an unrelated username/password configuration with IP authentication.
- Transport and audio: match the supported settings on both sides. A signaling connection alone does not prove that audio encryption and media settings match.
Save the trunk and check its status. For version-specific fields and supported configurations, consult the 3CX SIP-trunk guide. A generic configuration is not a claim that IllyVoIP is a 3CX-certified provider.
Step 4: Create an outbound rule
In 3CX Outbound Rules, create a rule for the extensions and numbers you want to route through IllyVoIP. Select the IllyVoIP trunk. Check the digits after any strip/prepend operation: the destination must be in the international format expected by your route.
If using a package technical prefix, copy its current value from IllyVoIP and apply it only once. Do not reuse a historical prefix from a screenshot. Use a Caller ID permitted by your account and selected package. See the 3CX outbound-routing guide for version-specific rule matching.
Step 5: Add your incoming DID numbers
Add each active IllyVoIP DID to the trunk's DID list. Use the incoming-number format expected by your 3CX configuration. Then assign the number to an extension, ring group or other intended destination in 3CX.
Step 6: Route the number from IllyVoIP
Open Phone Numbers, choose the active DID and select Configure. Save the supported route to your PBX or the appropriate registered SIP identity. External-SIP routing and registration are different delivery choices: configure the one you intend to use, with the correct region and network access.
Step 7: Test both directions
- Make an outbound call from an allowed 3CX extension to a number you control.
- Confirm ringing, answer, audio in both directions and the Caller ID seen by the recipient.
- Call your DID from another phone and confirm the intended 3CX destination rings.
- Review both the 3CX event log and IllyVoIP Call Reports if a test fails. Send support the public call reference and symptoms, never passwords.
Worked outbound-rule checks for 3CX administrators
Use this section after configuring the IllyVoIP trunk above. It follows the current 3CX outbound-routing documentation for the Admin Console. Available controls depend on your version, edition and permissions. Start with one test extension and preserve the existing rule order before changing it.
1. Record the matching conditions
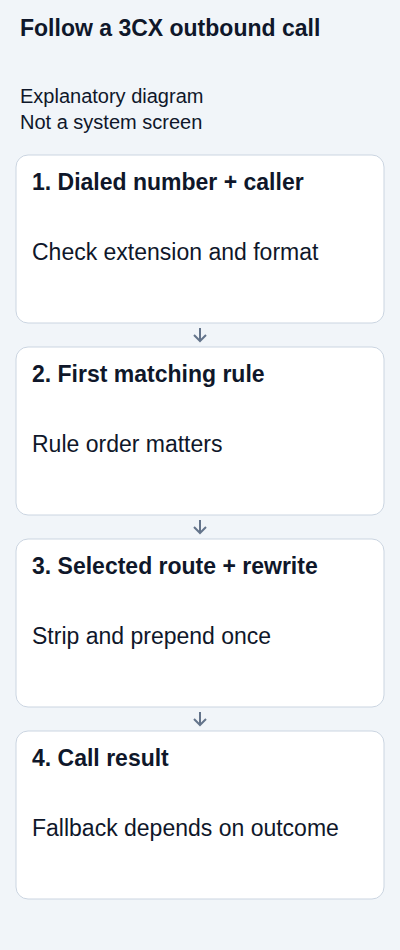
Open Outbound Rules and inspect the rule intended for IllyVoIP. Note its number prefix, permitted length, extension/department selectors, routes and position in the list. A rule name such as Test does not restrict who can use it.
Rules are considered from top to bottom. Once a rule matches, later rules do not provide an alternative match for that call. Place a specific rule appropriately relative to broader patterns, then check which existing users and number formats also match it.
Do not assume that selecting both named extensions and a group/department makes a narrower intersection. 3CX documents the extension and extension-group choices as cumulative. Check the current selector behavior and test an allowed and a nonselected extension before relying on a restriction.
2. Separate matching from number rewriting
The rule matches what the extension dials; strip/prepend operations then change what goes to the selected route. Write a before-and-after example before saving. These are deliberately fictional formats, not destinations to call:
- Full international digits already entered: illustrative
441234567890stays441234567890when no stripping or prefix is required. - Office access digit before those digits: illustrative
9441234567890becomes441234567890only under a rule that deliberately matches the access-digit format and strips exactly one digit. - Leading plus entered by an application: decide how your configured route handles it. Do not apply an unconditional one-digit strip to both plus-prefixed and digits-only input.
These examples demonstrate transformations, not a universal national dialing plan. For your test, use a number you control and the format expected by the IllyVoIP route. Do not prepend a country code to a number that already has one. Apply any authorized package technical prefix once, at the layer you deliberately chose.
3. Set a deliberate route and caller ID
Under Make outbound calls on, select the intended IllyVoIP trunk for the first route. For the initial test, do not add an unrelated backup provider that could hide a failing configuration or change the charge. Preserve intentional blocking for routes you have not authorized.
A rule's Outbound Caller ID is still subject to IllyVoIP's caller-ID permissions and the selected package. Use an eligible identity, then check what the receiving phone actually displays. Typing a number into 3CX does not verify ownership.
4. Understand when a backup route is used
3CX can try subsequent routes under documented failure conditions, but it does not retry every unsuccessful outcome. Busy responses such as 486/600 and the internal 1408 status can stop the route search. Caller cancellation or an answered call also prevents a new route attempt. Do not confuse internal 1408 with an observed SIP 408.
Multiple routes can change early-media behavior, including whether a caller hears a provider announcement. Review this before using fallback for a workflow that relies on spoken rate or failure information. An IP-based trunk may look available without a registration exchange; test real calls rather than treating a green state as reachability proof.
5. Save, inspect the resulting order and test
Save the rule and check its actual position. A newly created rule starts at the bottom in the documented workflow. Move it only as needed for the intended matching priority, with the earlier order recorded for rollback.
From the chosen extension, call an authorized destination and inspect the PBX's selected rule, trunk and transmitted number. Match the IllyVoIP call report by time and reference. Confirm ringing, answer, two-way audio and caller ID. Normal call charges apply.
Then check another ordinary number format used by that extension and a user who should not gain access through the new rule. Use controlled destinations; do not test a restriction by dialing emergency or premium services. Retest incoming calls if shared trunk settings changed.
If the wrong route still handles the call
Compare the actual dialed string with earlier rules, including prefix and length. Verify extension/department membership and whether another device line was selected. If the correct trunk receives a correctly formatted request but rejects it, follow the actual final response and account policy rather than repeatedly rearranging rules.
Restore the previous rule or order if the change affects unrelated calls. Keep the working configuration and failed example for Support; never send SIP passwords or a complete unreviewed configuration export.
Related guides and references
- My SIP phone is registered, but outgoing calls fail
- Choose and verify your outgoing caller ID
- SIP response codes
- 3CX outbound rule matching and route selection
Reviewed 10 October 2026 against current IllyVoIP guidance and the official references above. Version-specific commands and menus need to match your installation. This guide does not claim a completed call test on your PBX or network.