
Open Settings → Voice → Routing and find Call capacity to see how many simultaneous calls your account allows and how quickly new calls may start. If your expected workload needs more capacity, use Request increase. The new limits take effect only after the request is approved and applied.
This guide is for an account owner or an authorized team member planning a calling workload. You do not need to change the routing package, voice region or a phone’s SIP settings to submit a capacity request.
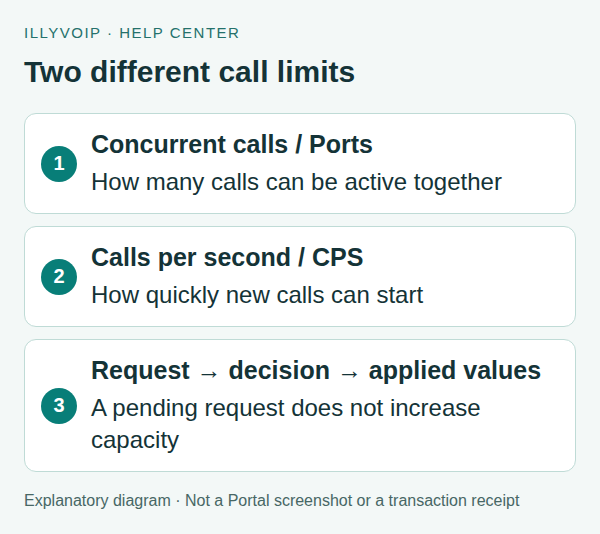
1. Read the two limits separately
The concurrent-call limit, also called Ports in the request form, is account-wide simultaneous-call capacity. CPS means calls per second: the permitted rate of starting new calls. A high limit in one dimension does not remove the other limit.
| Situation | What to examine |
|---|---|
| Many conversations stay connected at once | Concurrent-call capacity |
| A dialer starts many calls together | CPS and its start-rate settings |
| Calls fail even with little traffic | The actual failure evidence; capacity is not automatically the cause |
For example, a team may have 20 ongoing conversations but start only one new call each second. Another application may start several calls together while only a few calls are connected. These are illustrative workloads, not the limits assigned to your account.
2. Check the current account values
- Sign in to the intended IllyVoIP account and open Settings.
- Choose Voice, then Routing. The routing-package shortcut in the Portal header also leads to routing settings.
- Read Call capacity and record both current values. The CPS row uses the current Portal label; its value in this panel is separate from a request you have not yet submitted.
- Review any pending request or warning before taking another action.
Do not copy limits from screenshots, a different account or a sales example. Selecting a different package is not a substitute for checking the account’s applied capacity.
3. Work out what you need
Use your actual peak simultaneous calls and your application’s call-start rate. Include the planned change: more agents, an additional PBX, or a scheduled workload. Ask for a justified target rather than entering a large number to make an unrelated call failure disappear.
A useful reason could be: “Our team is growing from 12 to 20 active agents. We expect up to 20 concurrent conversations and our application starts no more than two new calls per second.” This is an example explanation, not a recommended setting for every customer. Capacity approval does not guarantee that every destination or carrier can accept the same traffic rate.
4. Submit the request once
- Select Request increase.
- In Request limits increase, enter the needed Requested ports, Requested CPS, or both.
- Fill in Reason with your workload and the change you are planning.
- Review the values, then select Submit request.
- Wait for the result and confirm that the panel shows the request.
Follow the form’s validation messages. The current form describes -1 as an unlimited-limit request; entering it does not grant unlimited service. Only request that value if you have a specific requirement to discuss with the team. Do not resubmit repeatedly while a request is pending.
5. Read the decision and applied limits
Pending review means a request exists, not that capacity has increased. A processing state means the decision is still being handled. Open Recent capacity requests to review the displayed status, requested values, approved values where available, and any customer note.
An approved value can differ from the requested value. Check the current Call capacity panel after the decision before raising your PBX or dialer’s workload. If the decision and displayed capacity appear inconsistent, refresh and contact Support with the request details rather than starting a stress test.
6. If the request control is missing
- No permission: ask the account owner or a team member authorized to request capacity.
- A request is already pending: follow that request instead of trying to create another.
- History is temporarily unavailable: refresh before submitting a new request, as the warning instructs.
- Capacity information is unavailable: do not interpret the missing value as zero or unlimited. Wait for a valid value or ask Support.
If calls are failing, include a recent public call reference, the time and timezone, the traffic pattern, and the exact failure message. Those facts allow Support to distinguish a capacity problem from routing, authentication or destination rejection.
Frequently asked questions
Does increasing Ports also increase CPS?
No. They are separate limits. Request and verify each dimension you need.
Does more capacity change my calling rate?
Capacity and destination pricing are separate. Review your routing package and current rates; a capacity request does not establish a new tariff.
Can I use the requested limits immediately?
No. Continue using the currently applied limits until the decision is complete and the capacity panel confirms the result.
Related guides
Instructions reviewed on 8 October 2026. Available controls and service options depend on your account. Use the current values shown in your Portal.